WooCommerce
Connect Kalatori to your WooCommerce store with the official payment-gateway plugin. The whole installation takes about ten minutes and does not require any code.
Before you start
- A WordPress site with WooCommerce installed and activated.
- Your store currency set to USD (other currencies aren't supported yet).
- WordPress administrator access — you'll be uploading and activating a plugin.
- WooCommerce checkout configured with at least one low-value product you can use for a test order.
- A Kalatori merchant account — sign up at app.kalatori.org before continuing.
- A WordPress site reachable by Kalatori over public HTTPS, so payment-status webhooks can reach
/wp-json/kalatori/v1/webhook.
How it works
WooCommerce creates the order, the Kalatori plugin asks the Kalatori daemon to create a matching invoice, the buyer pays on the Kalatori payment page, and Kalatori sends a webhook back to WordPress so the order status can update automatically.
In this guide you'll download the plugin .zip, upload it to WordPress, enable Crypto (Kalatori) as a payment method, place a test order, and confirm both the Kalatori invoice and the WooCommerce order status.
1. Open the integration screen
After signing up you'll land on the Invoices page. While no payments have come in yet, you'll see a hint pointing you to integration setup — click Configure integration.
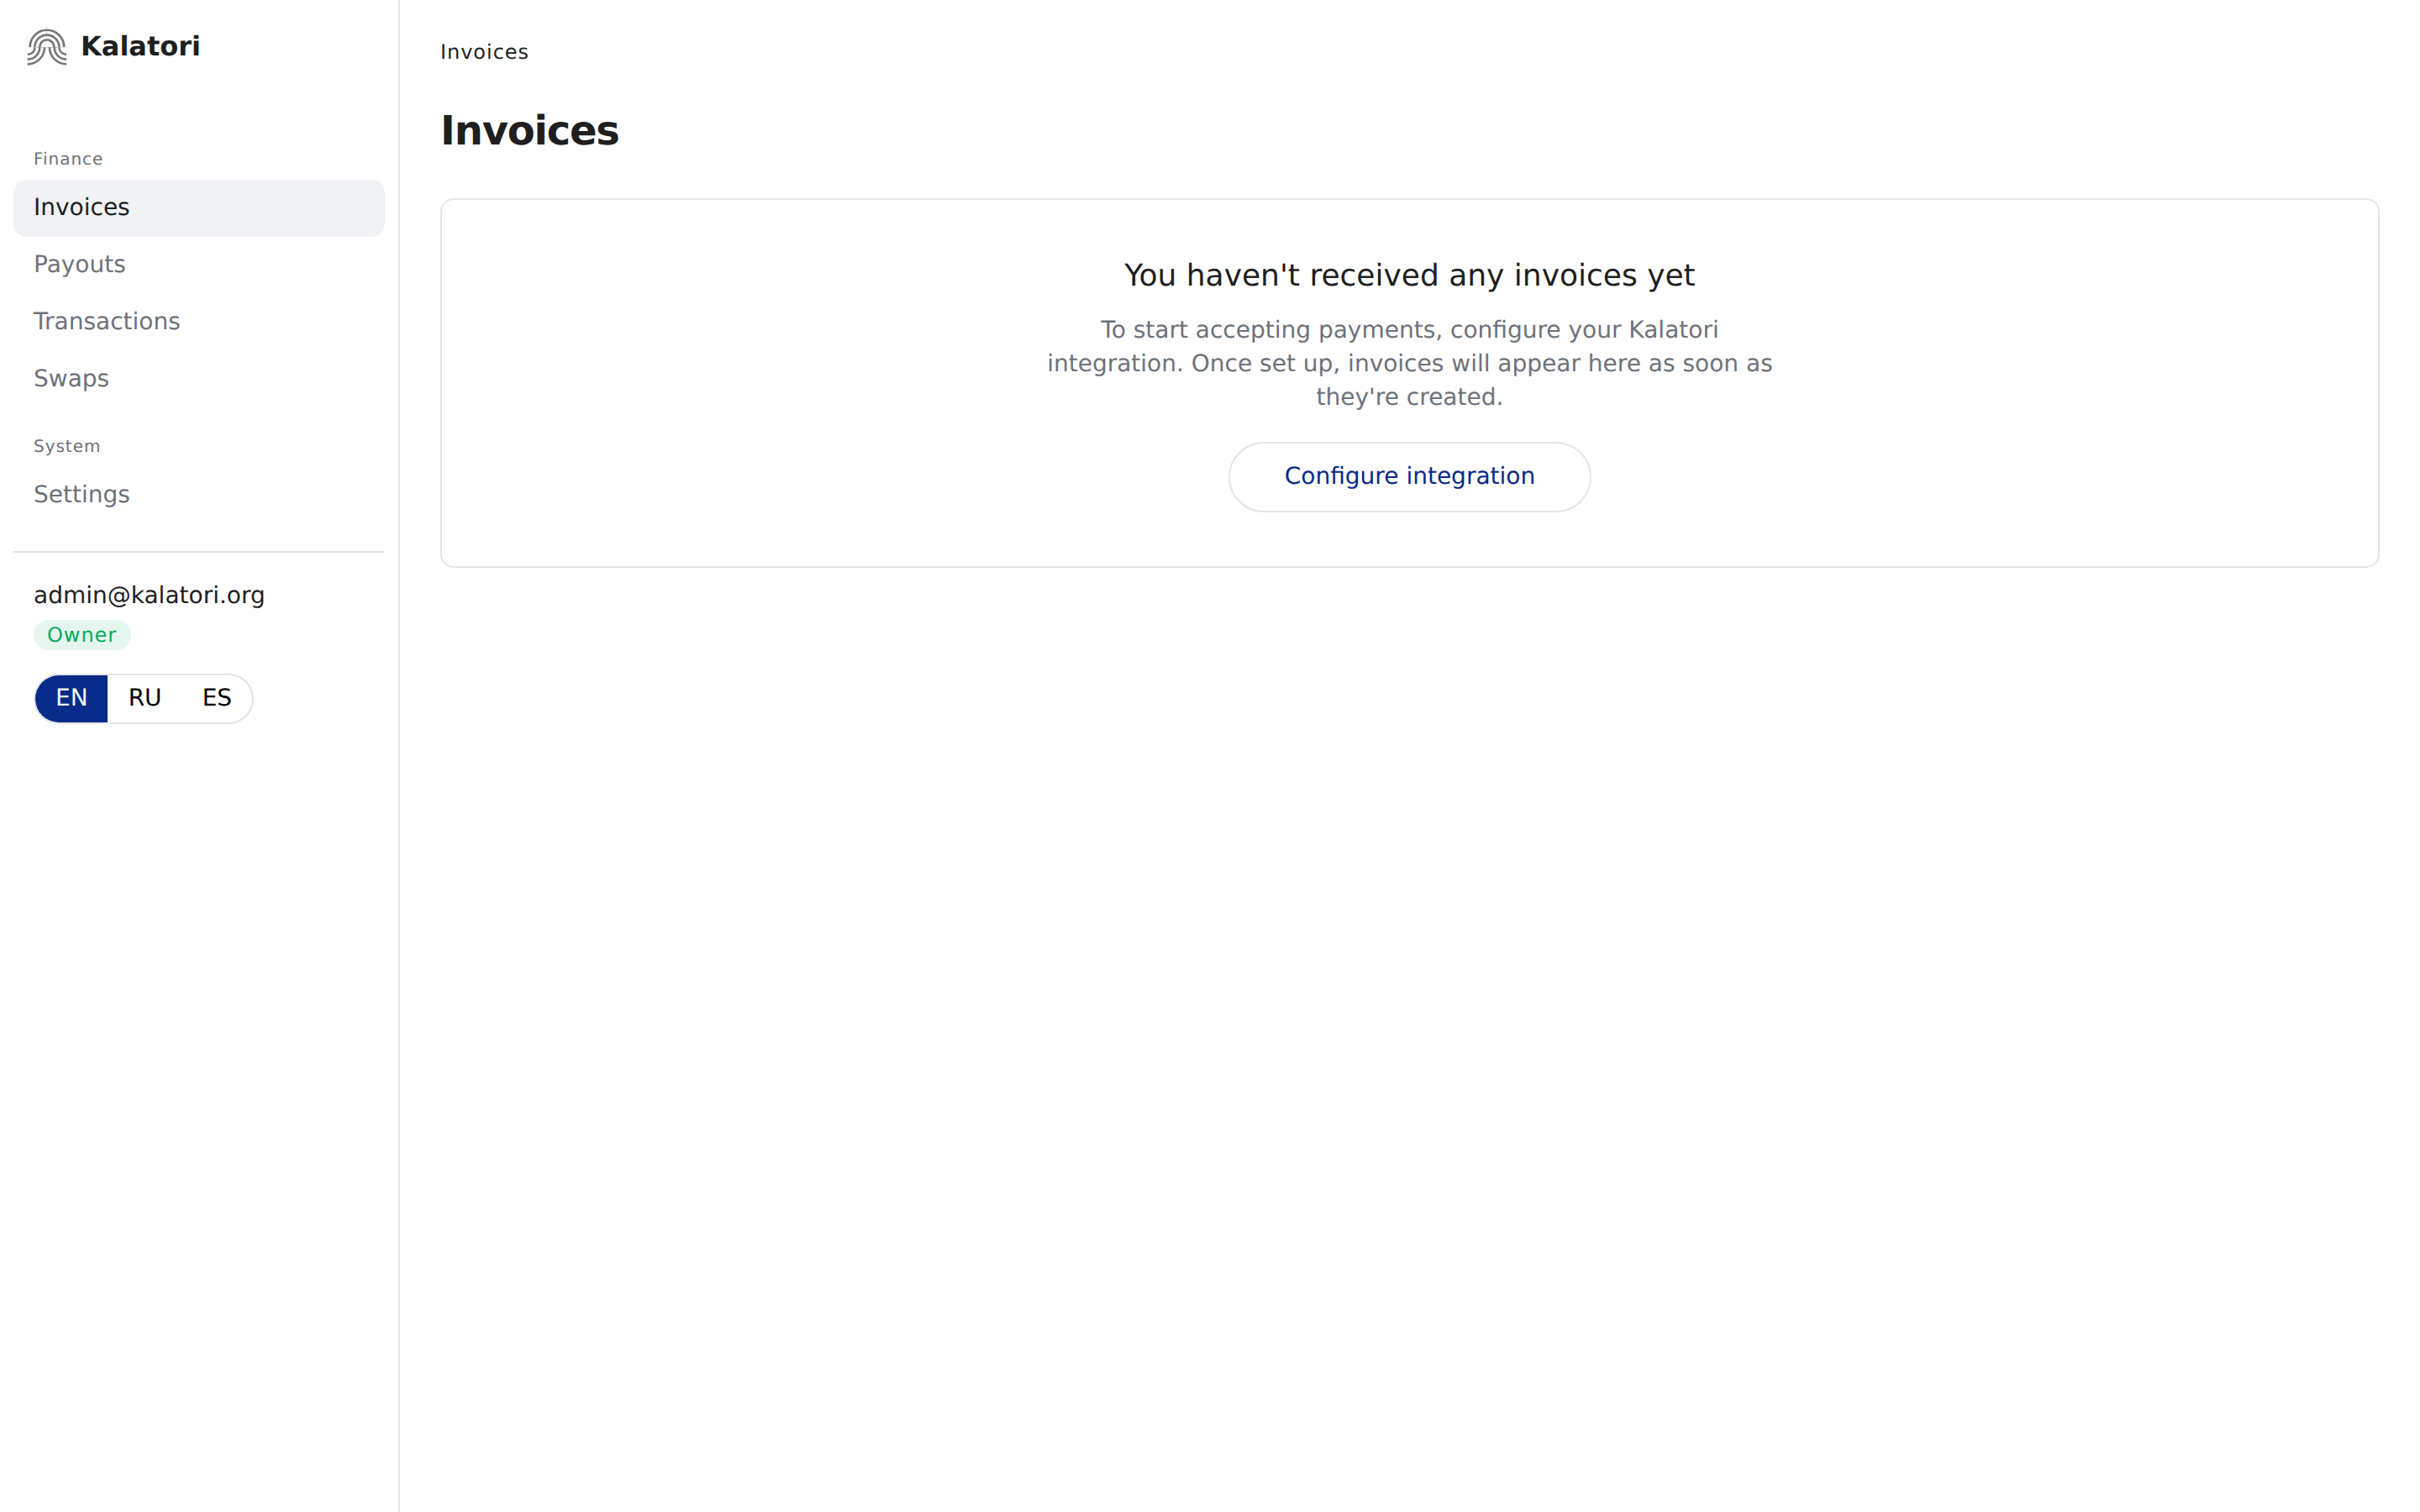
This opens Settings → Integration.
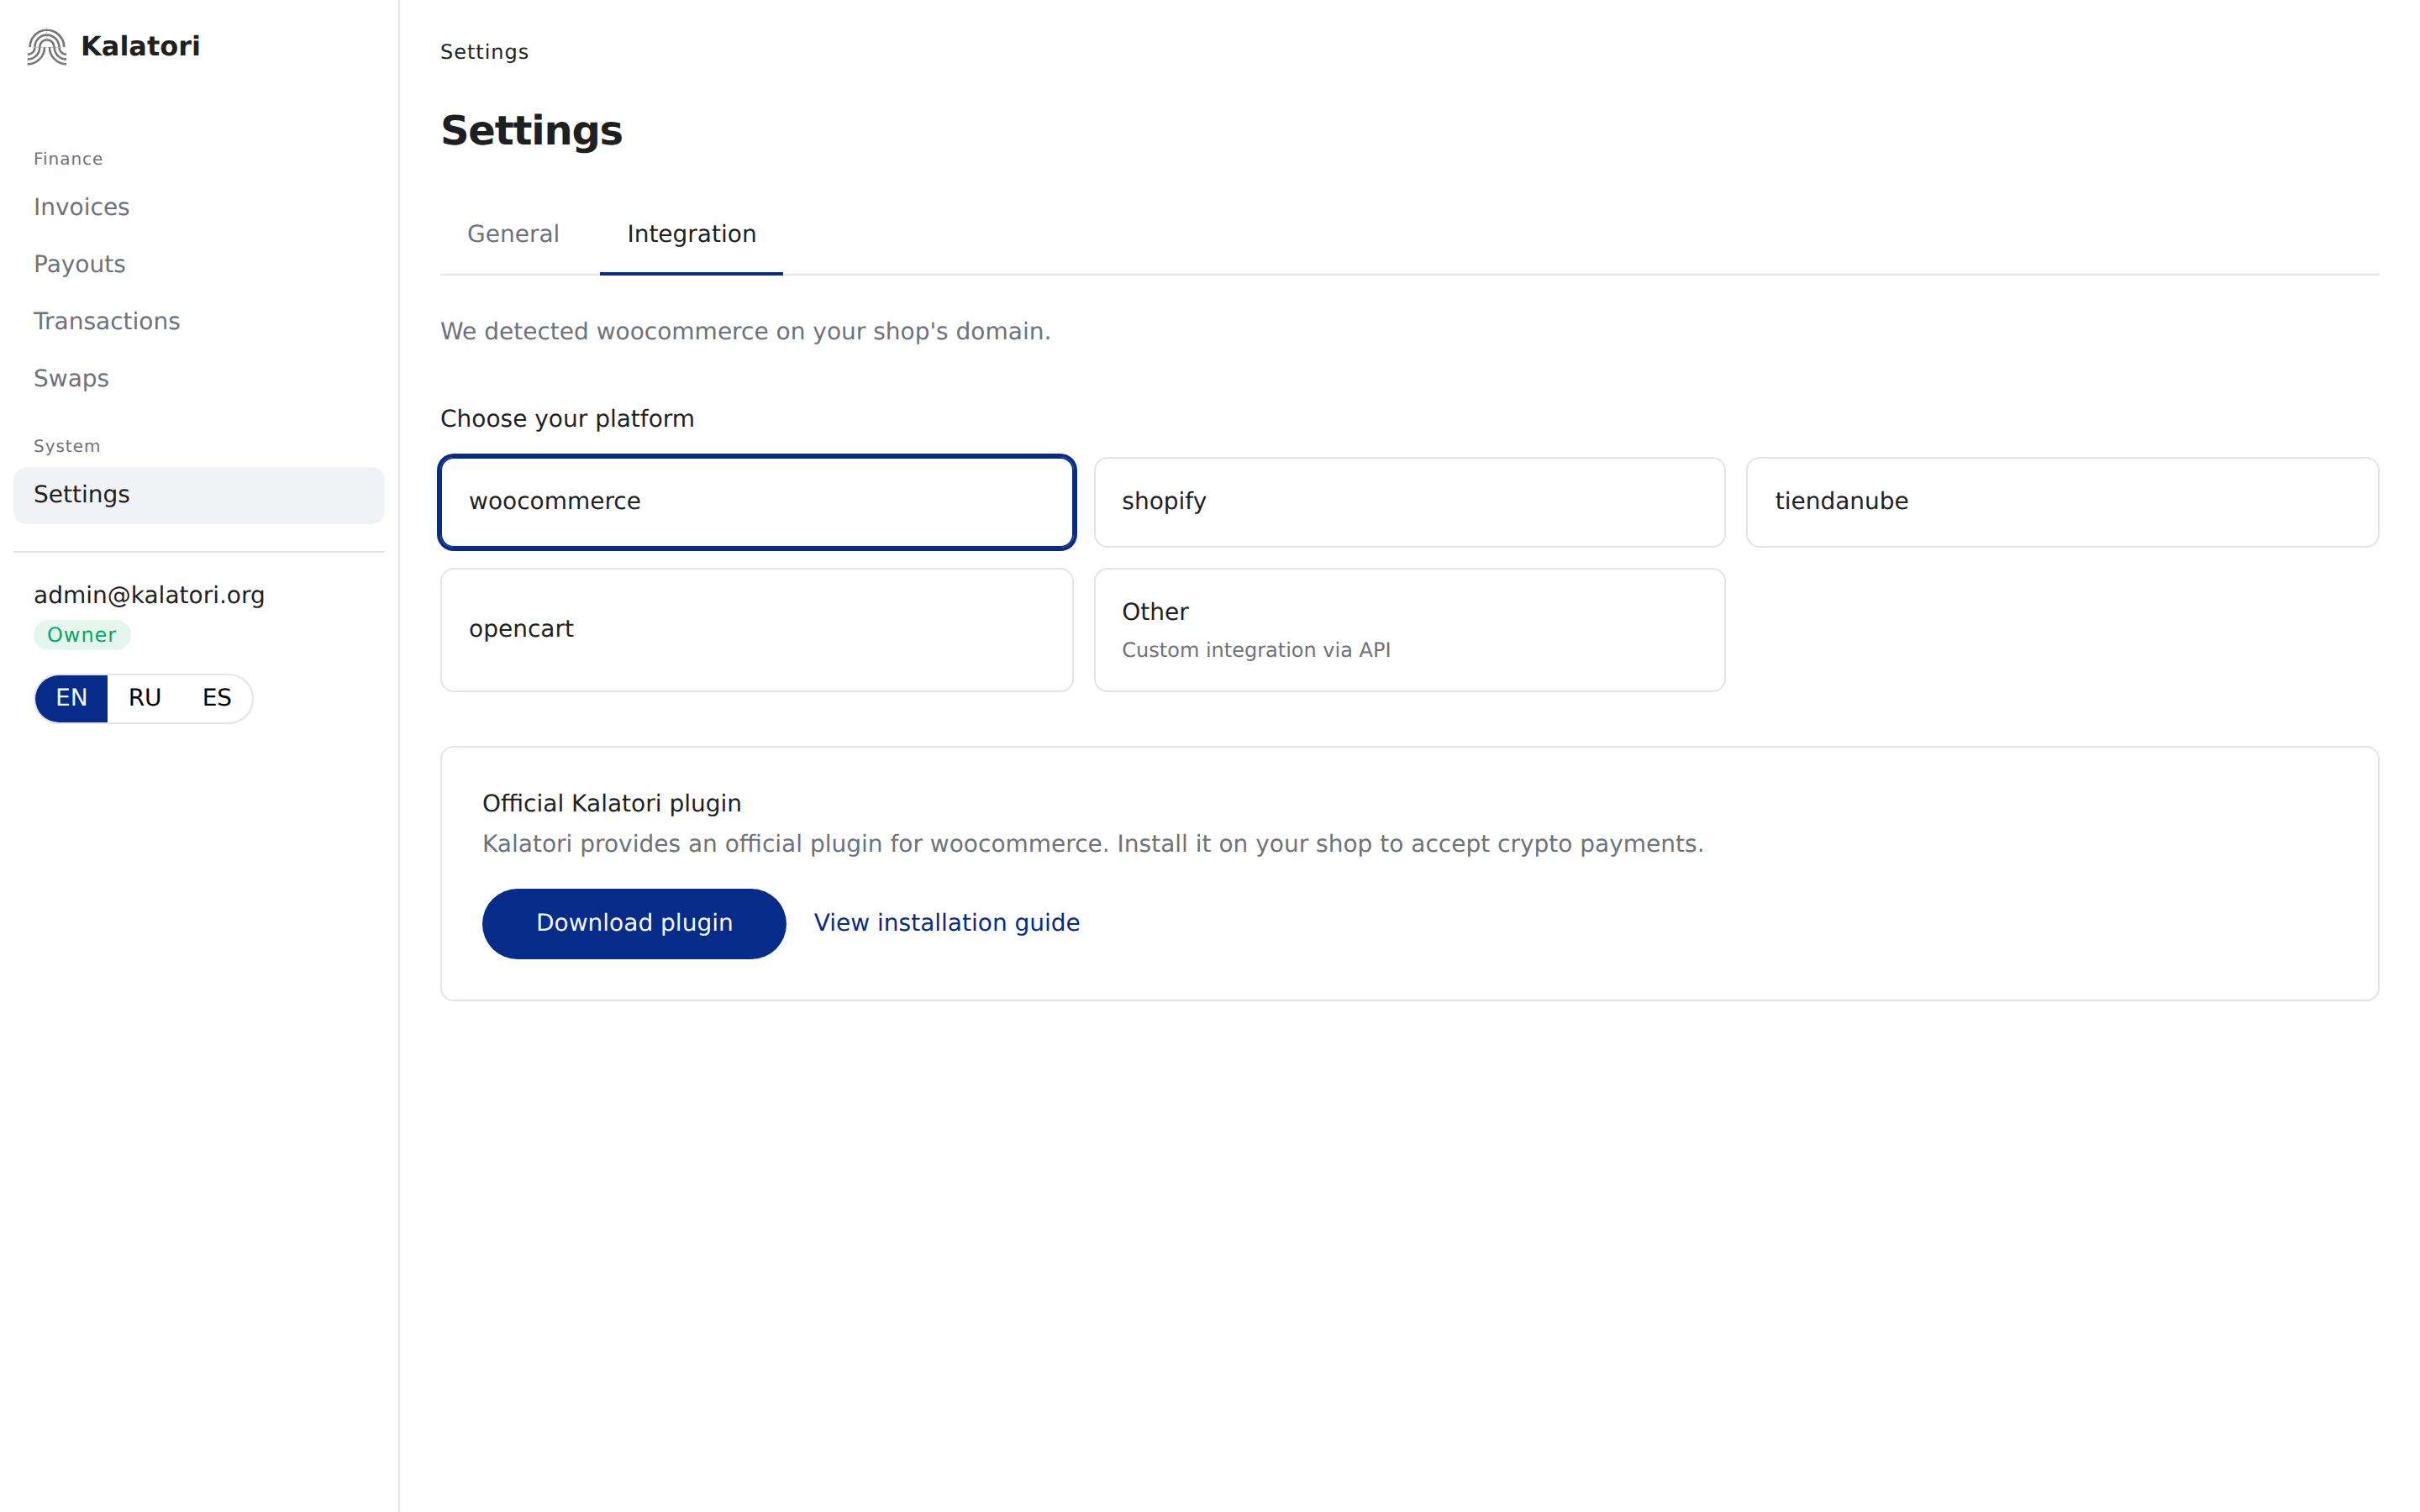
2. Choose WooCommerce as your platform
Kalatori tries to detect your store platform automatically. If it recognizes your shop's domain, you'll see "We detected woocommerce on your shop's domain." and the platform card labeled woocommerce will already be selected.
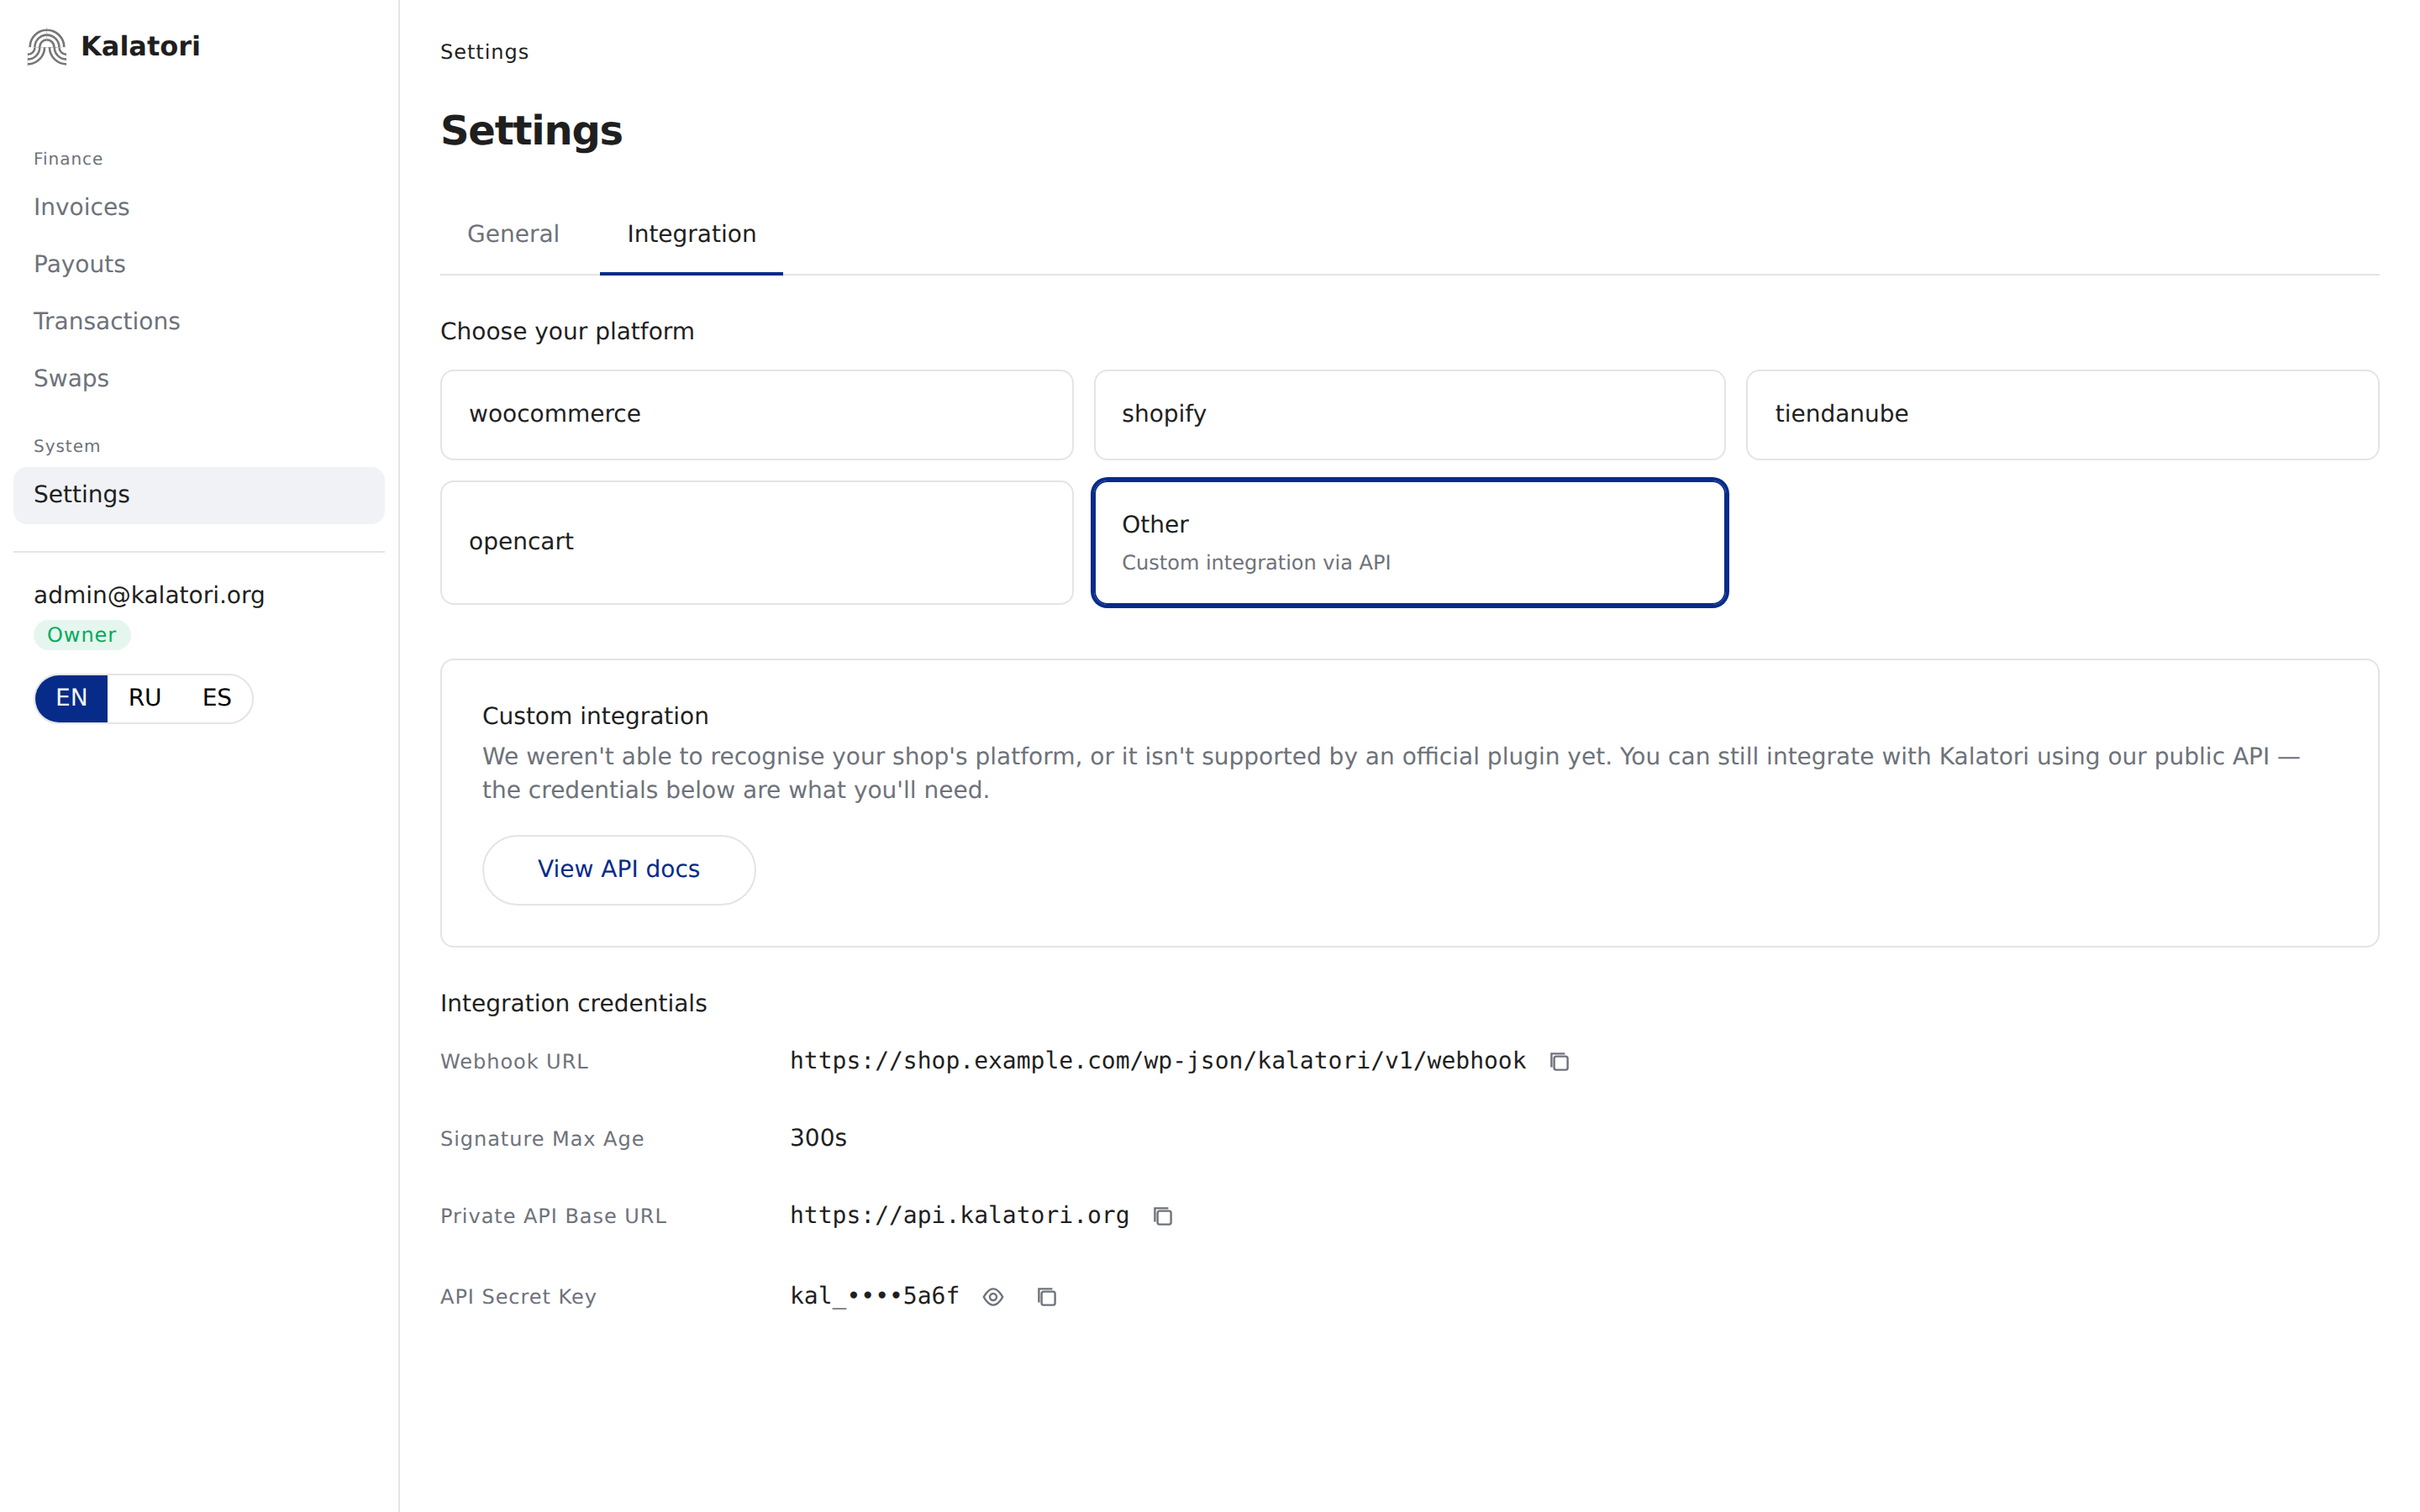
Don't see a Download button?
Only the platform card labeled woocommerce shows the plugin download. If Other is selected, the screen shows the Integration credentials block for custom integrations instead. Select woocommerce — the Official Kalatori plugin section will appear with the Download plugin button.
3. Download the plugin
With the woocommerce card selected, click Download plugin (visible on the screenshot above). The browser saves a .zip archive — you don't need to unpack it.
The archive is generated for your account and already contains your Kalatori credentials (Daemon URL + Secret Key) — you won't need to copy or paste anything during installation.
Keep the plugin archive private
The .zip contains account-specific credentials. Don't commit it to a repository, upload it to public issue trackers, or share it in chats where other people can download it. If it leaks, contact Kalatori support before accepting payments.
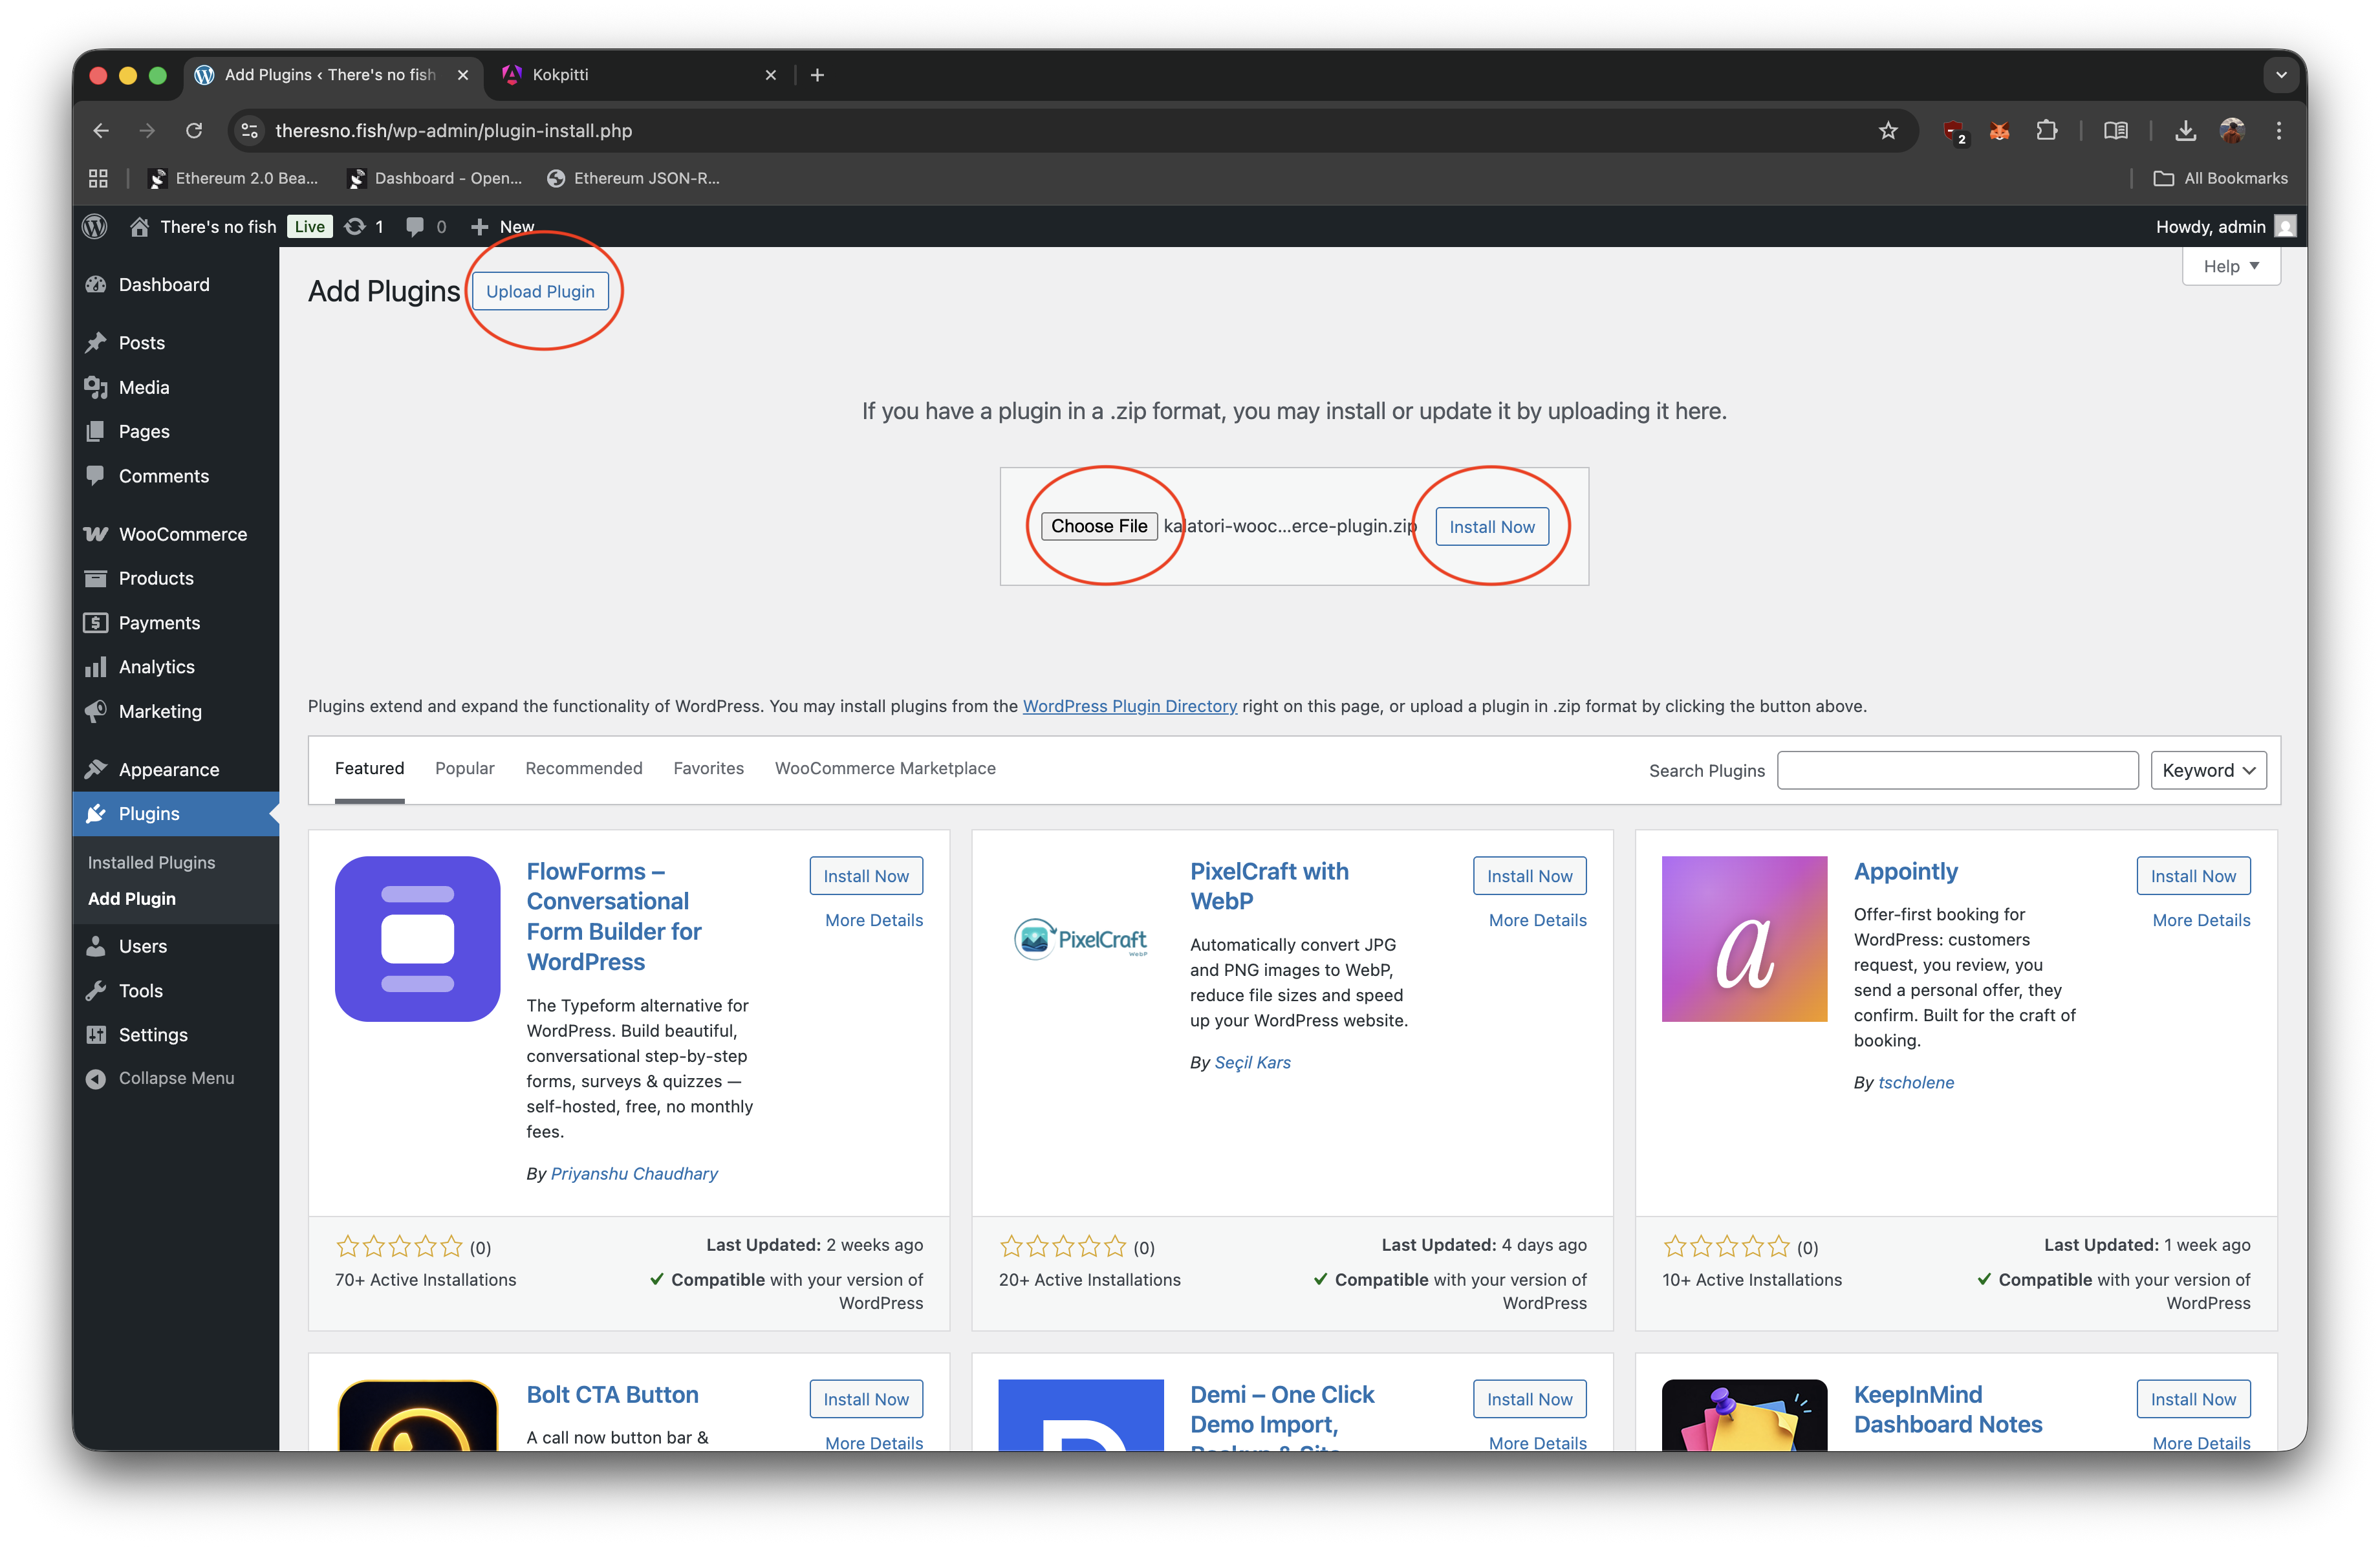
4. Upload the plugin to WordPress
In your WordPress admin, go to Plugins → Add Plugin.
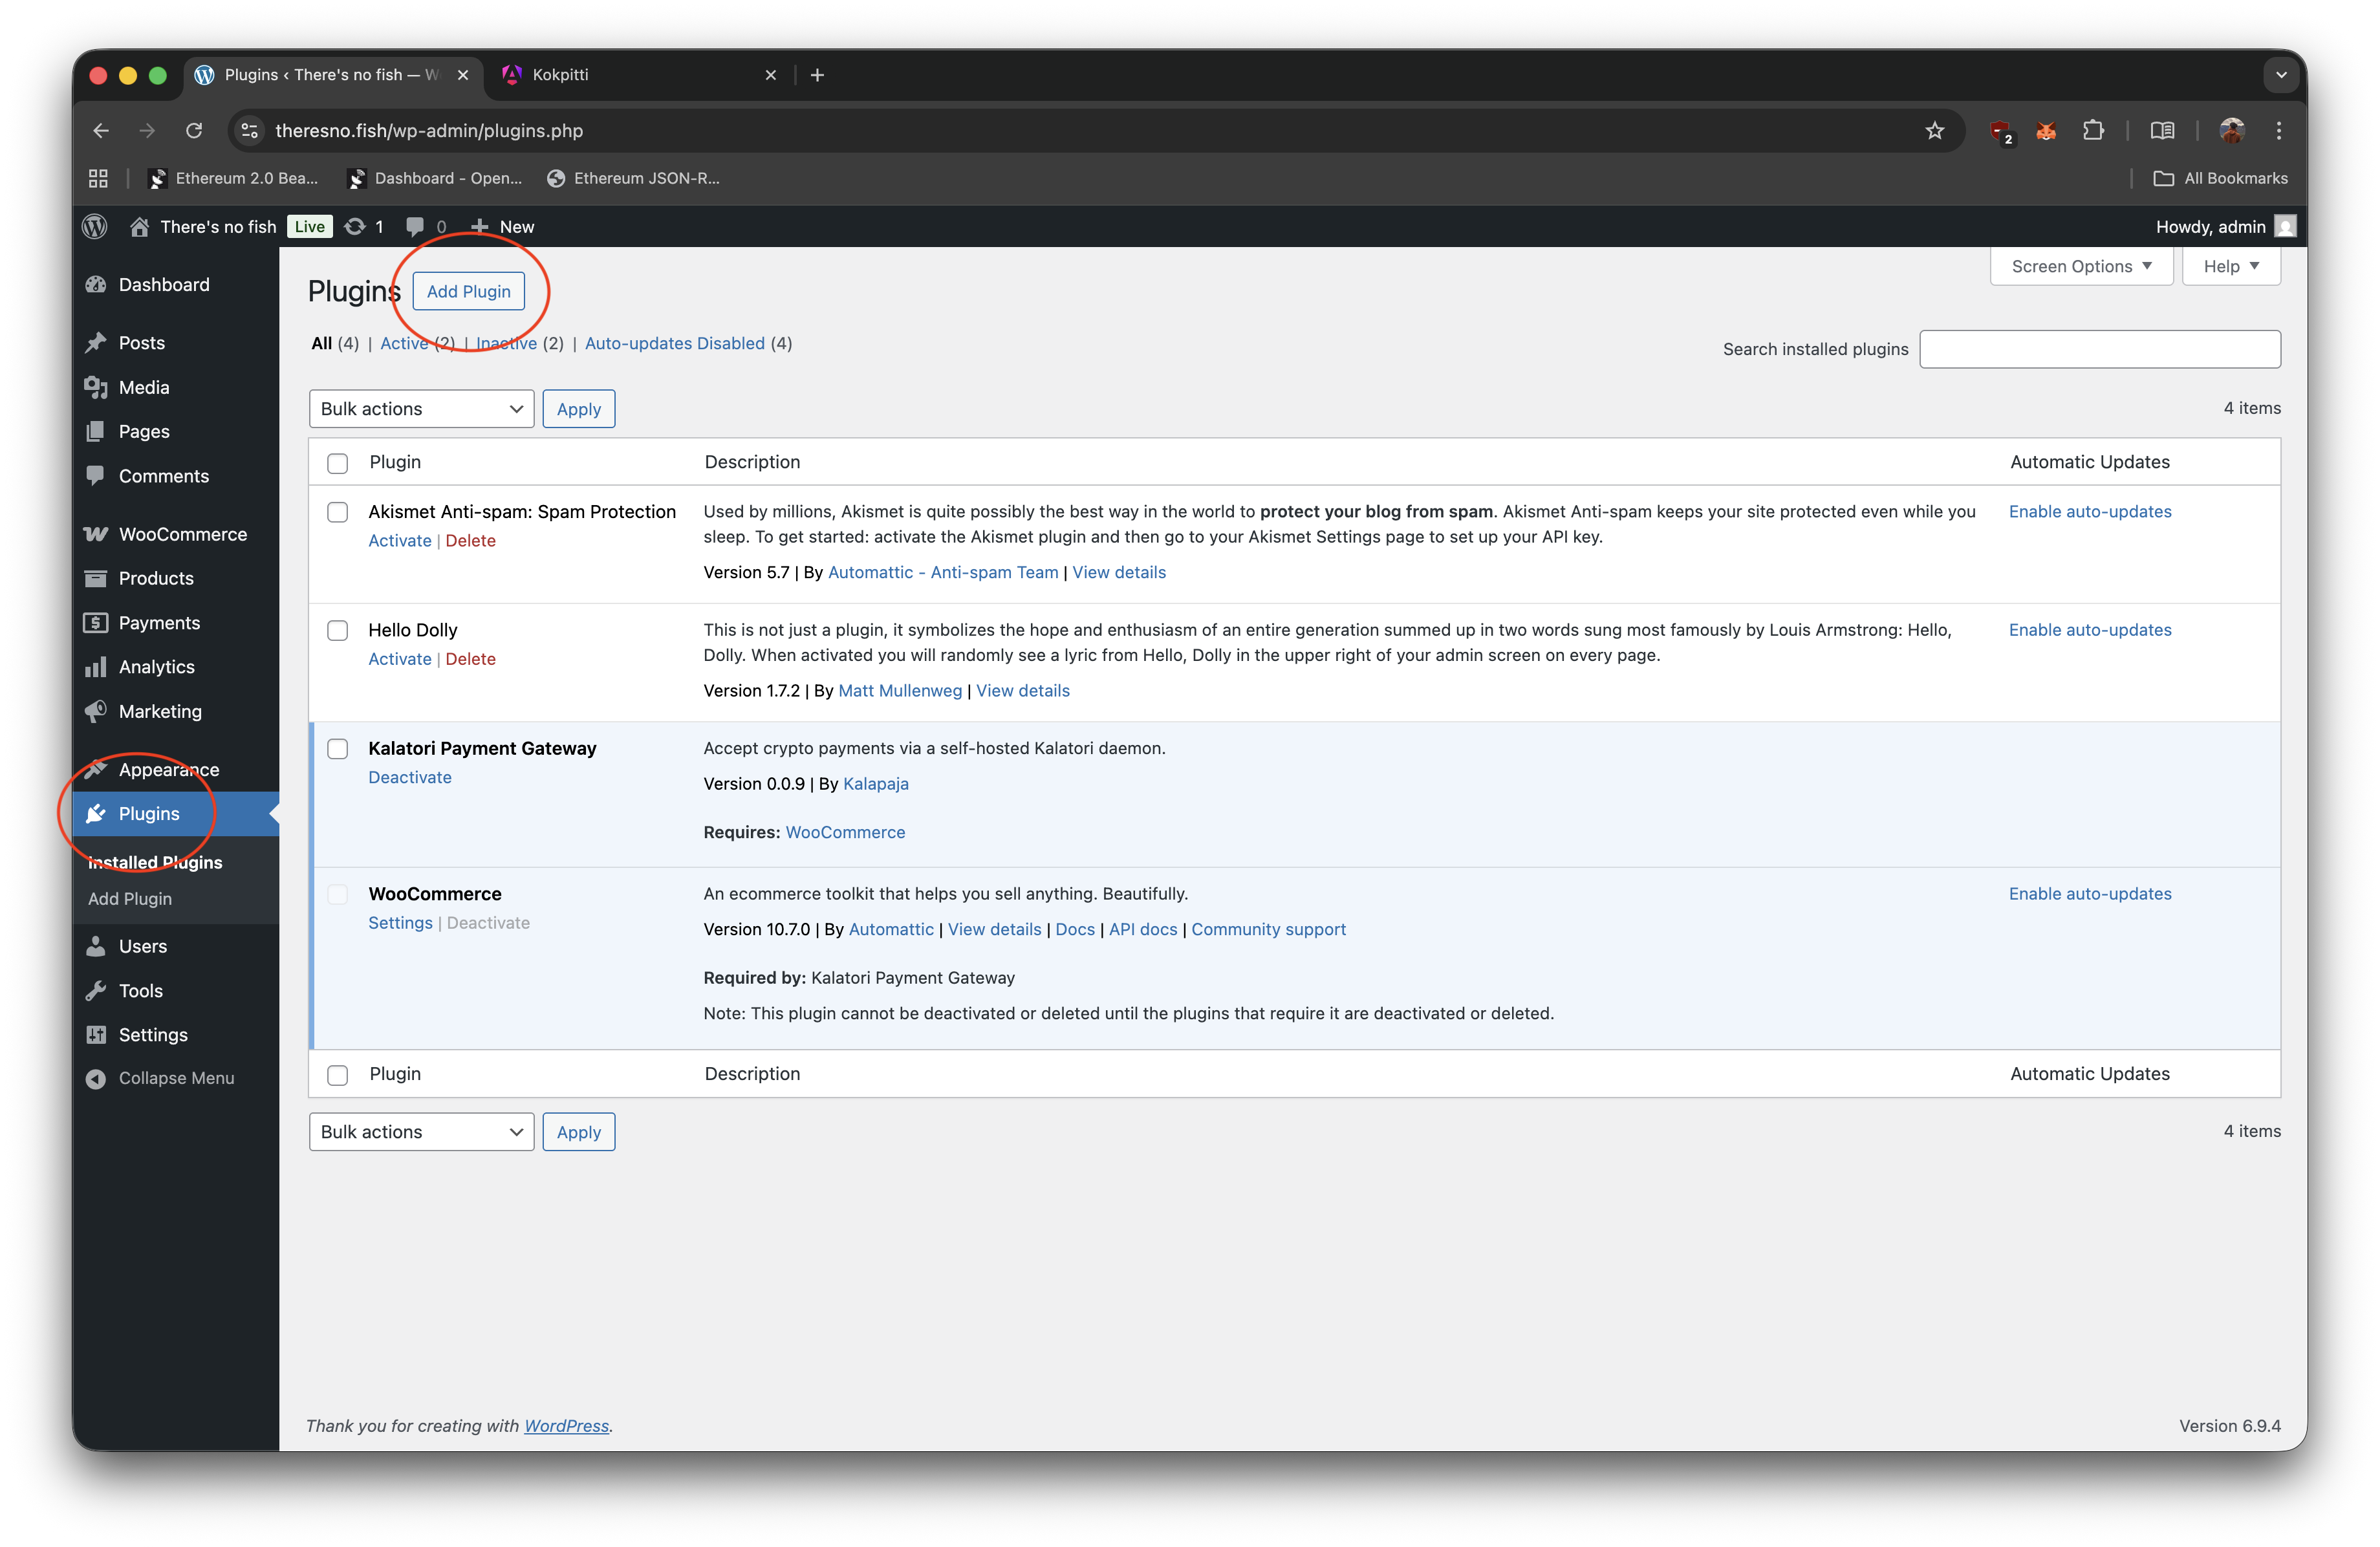
Click Upload Plugin, pick the .zip you just downloaded, then Install Now and Activate.
5. Confirm the plugin is active
Open Plugins and check that Kalatori Payment Gateway is in the list and shown as Active.
6. Enable the payment method
Go to WooCommerce → Settings → Payments and toggle Crypto (Kalatori) on.
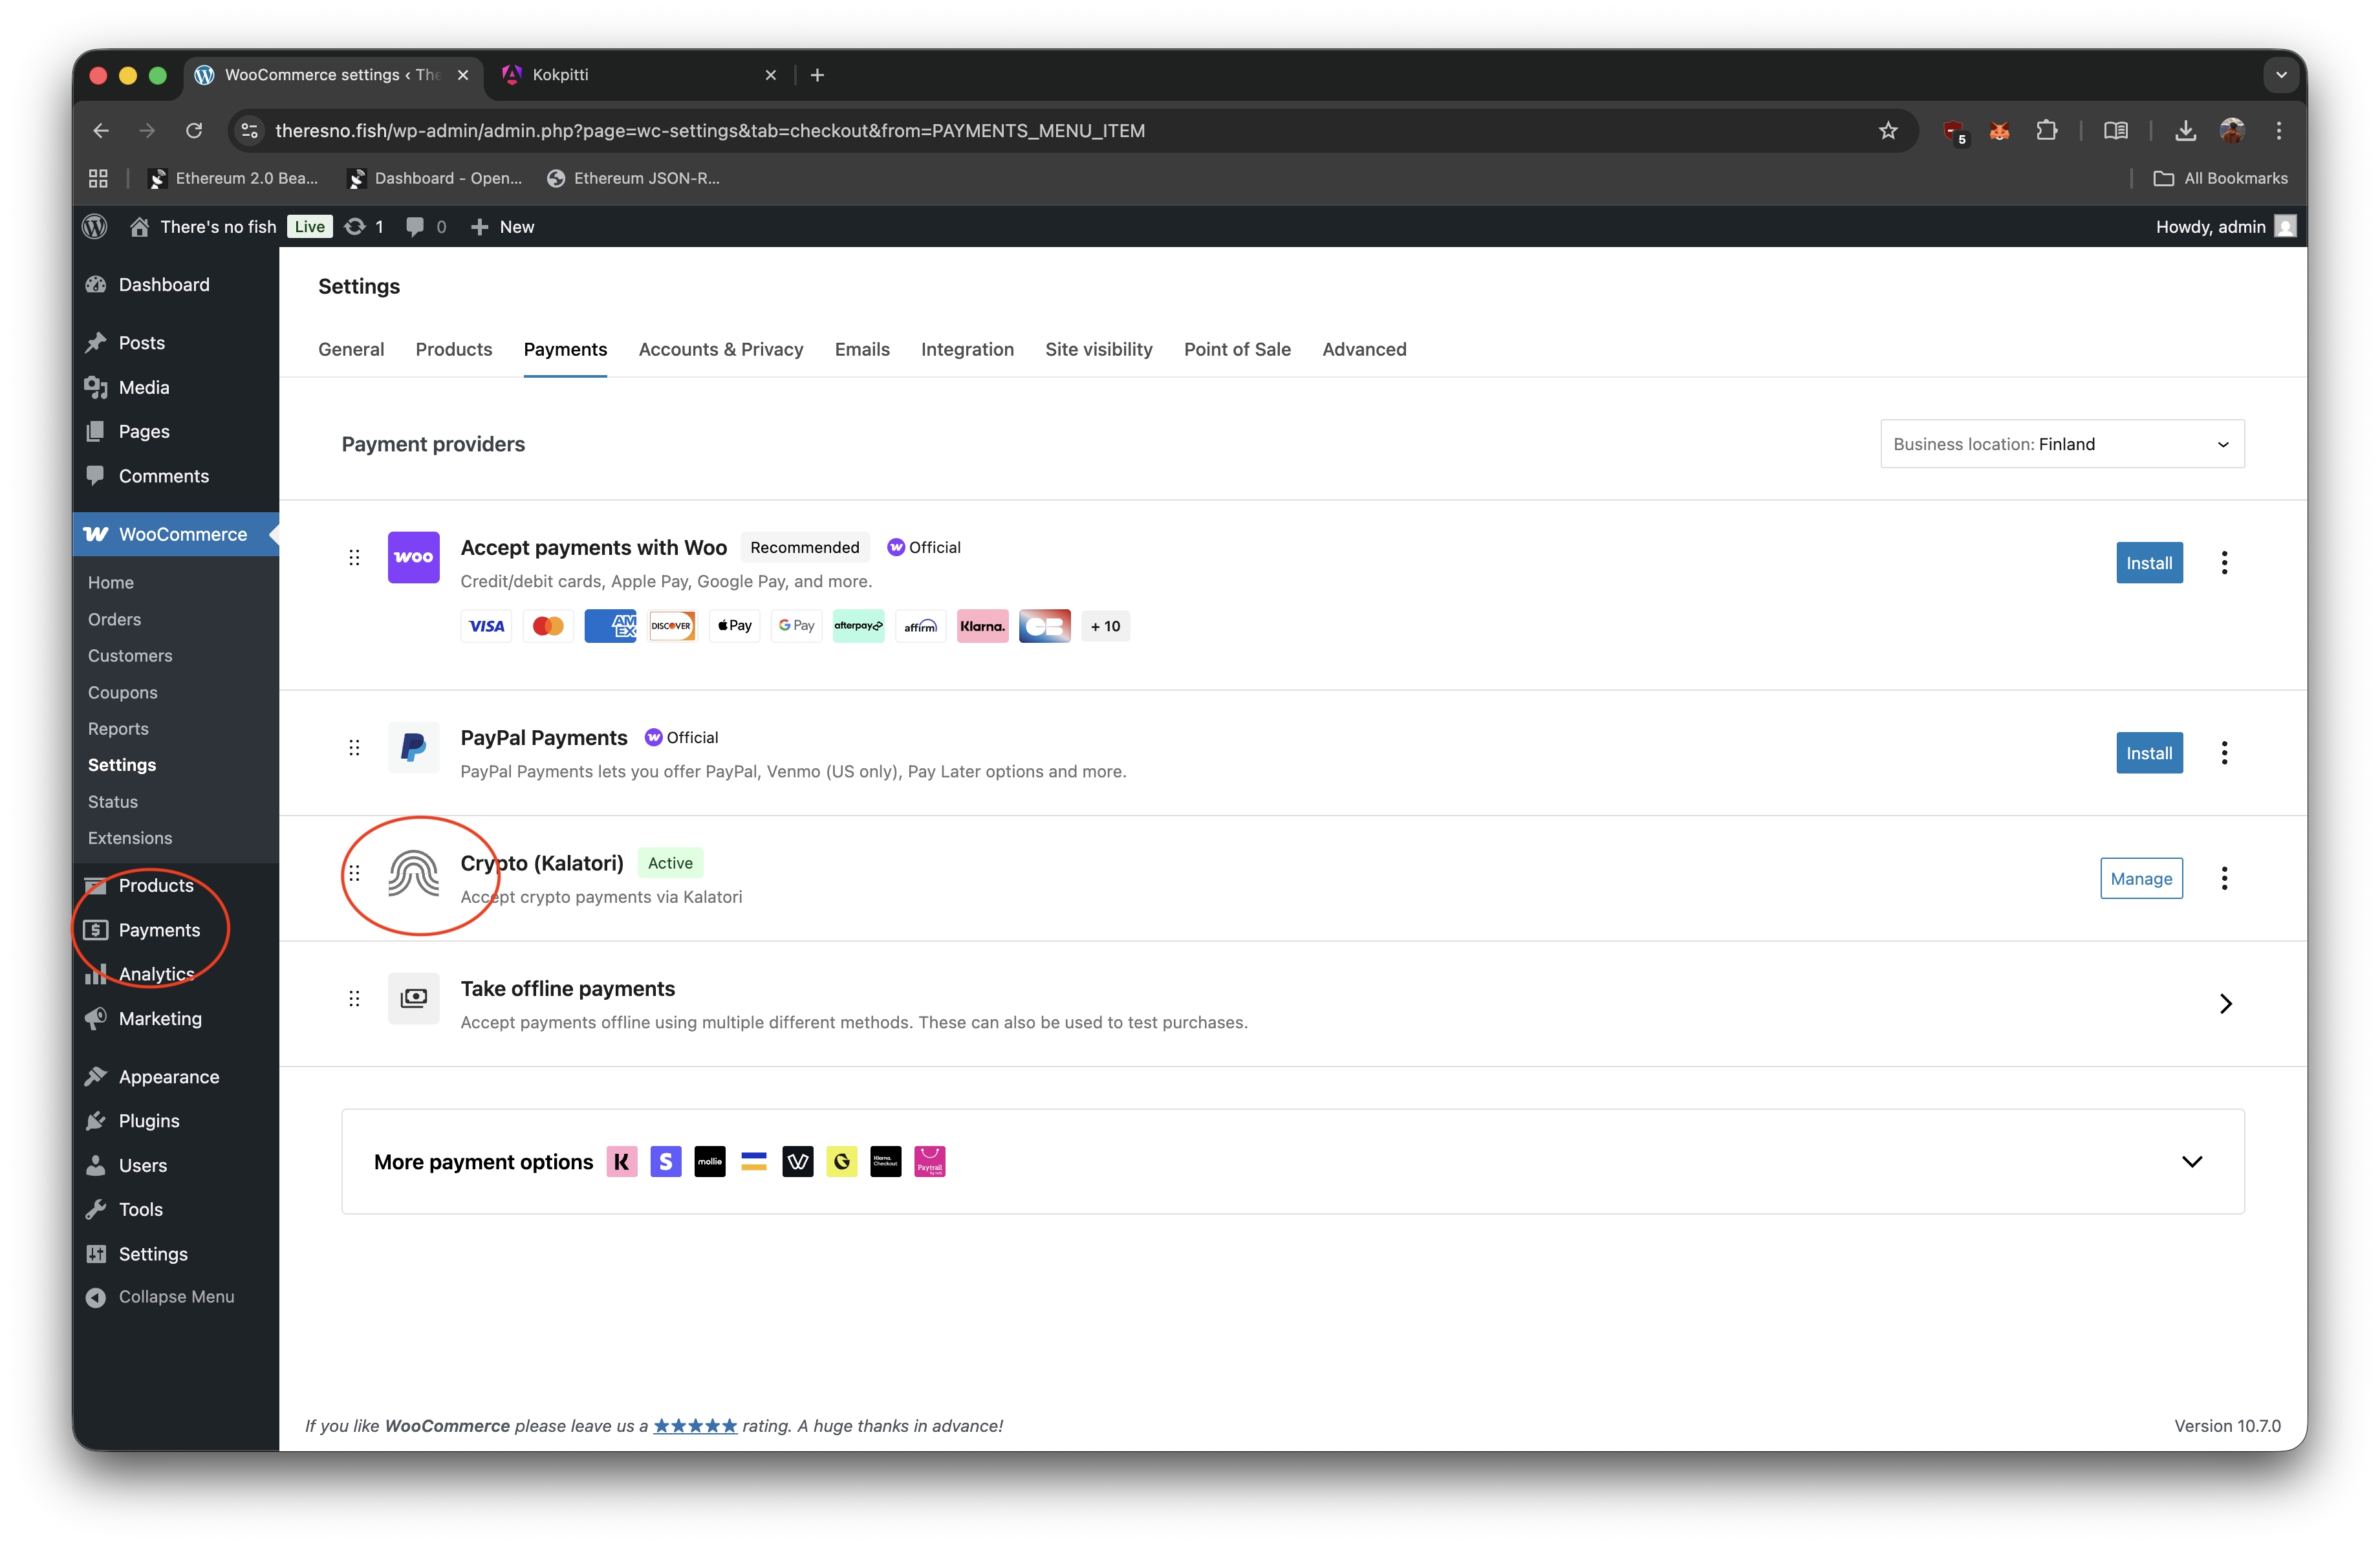
7. Test the connection
Click Manage next to Crypto (Kalatori) to open the plugin settings. The downloaded archive has already configured Kalatori credentials, so leave the generated connection settings unchanged unless Kalatori support asks you to edit them. Click Test connection. A green confirmation means the plugin can reach Kalatori.

8. Create a test invoice from checkout
Kalatori does not have a manual Create invoice button in the merchant panel for this flow. The invoice is created when a buyer chooses Crypto (Kalatori) at WooCommerce checkout.
- From your WooCommerce store, place a low-value test order and pick Crypto (Kalatori) at checkout.
- When the Kalatori payment page opens, return to your Kalatori merchant panel.
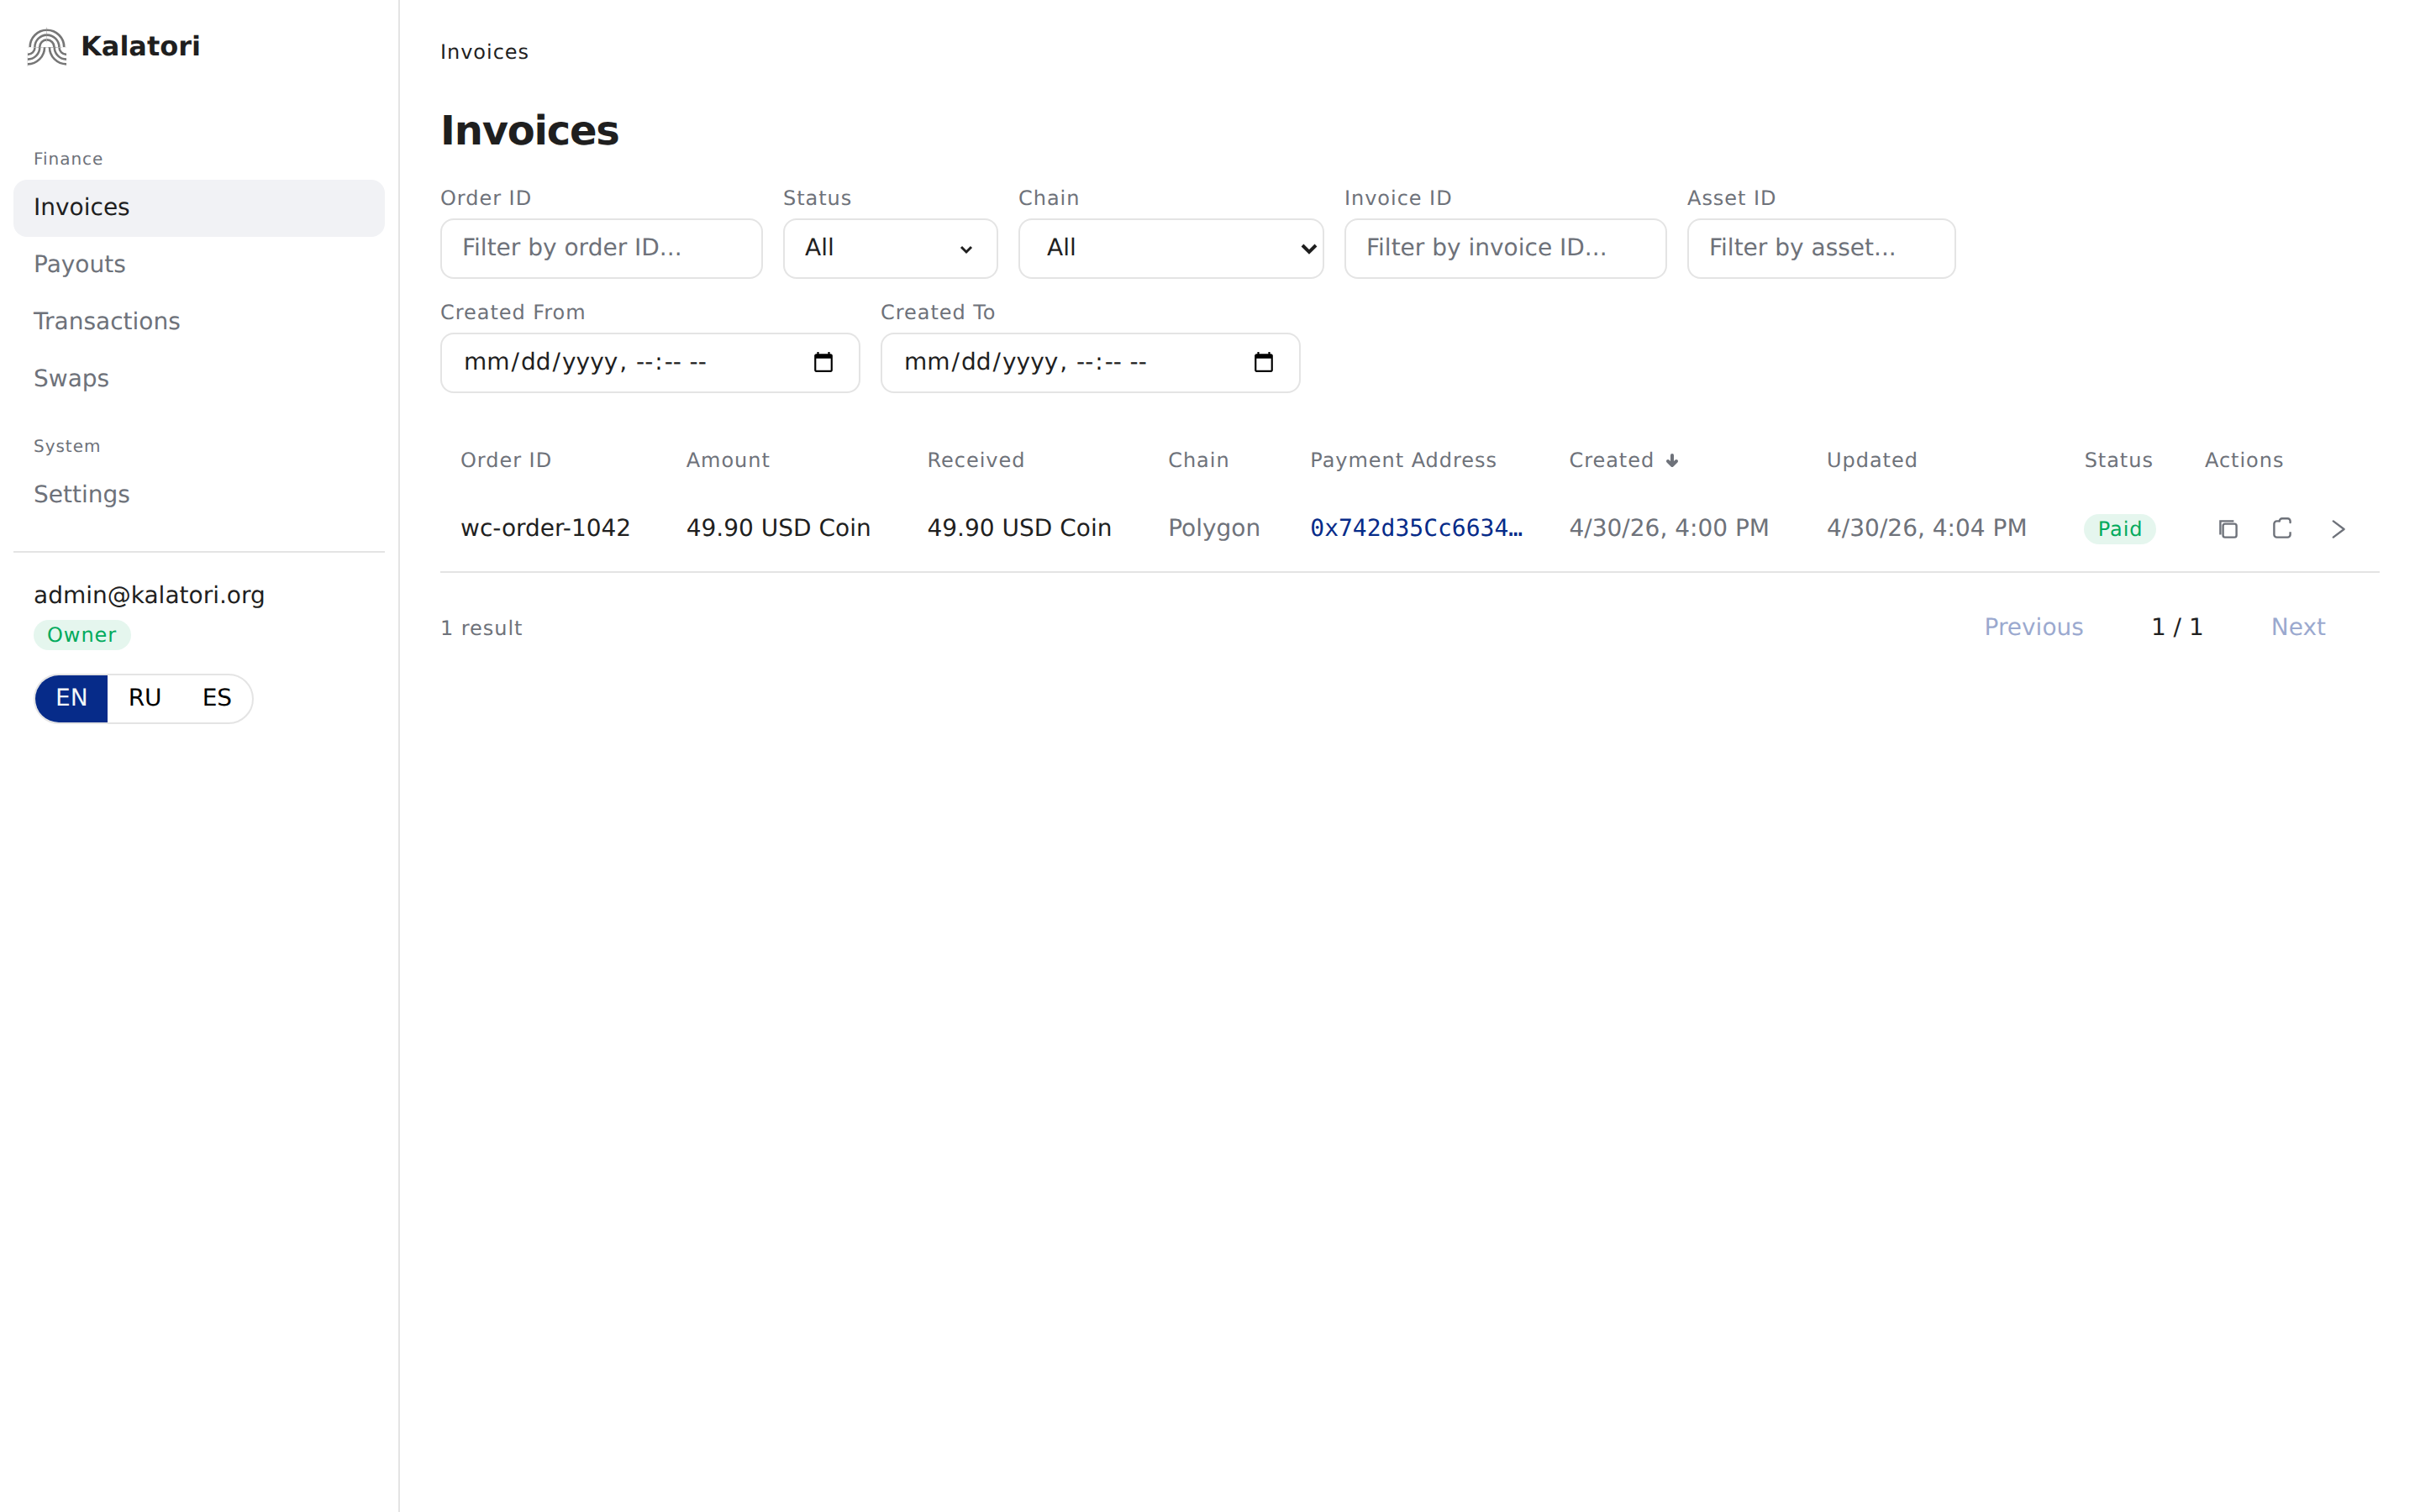
- Open Invoices. The new invoice should appear within seconds with the WooCommerce order ID. At this point its status should be Waiting — it switches to Paid only after Step 9.
If the invoice appears in the list, WooCommerce can create Kalatori invoices correctly.
9. Complete payment and confirm status sync
Buyers see Crypto (Kalatori) as a payment option at checkout.
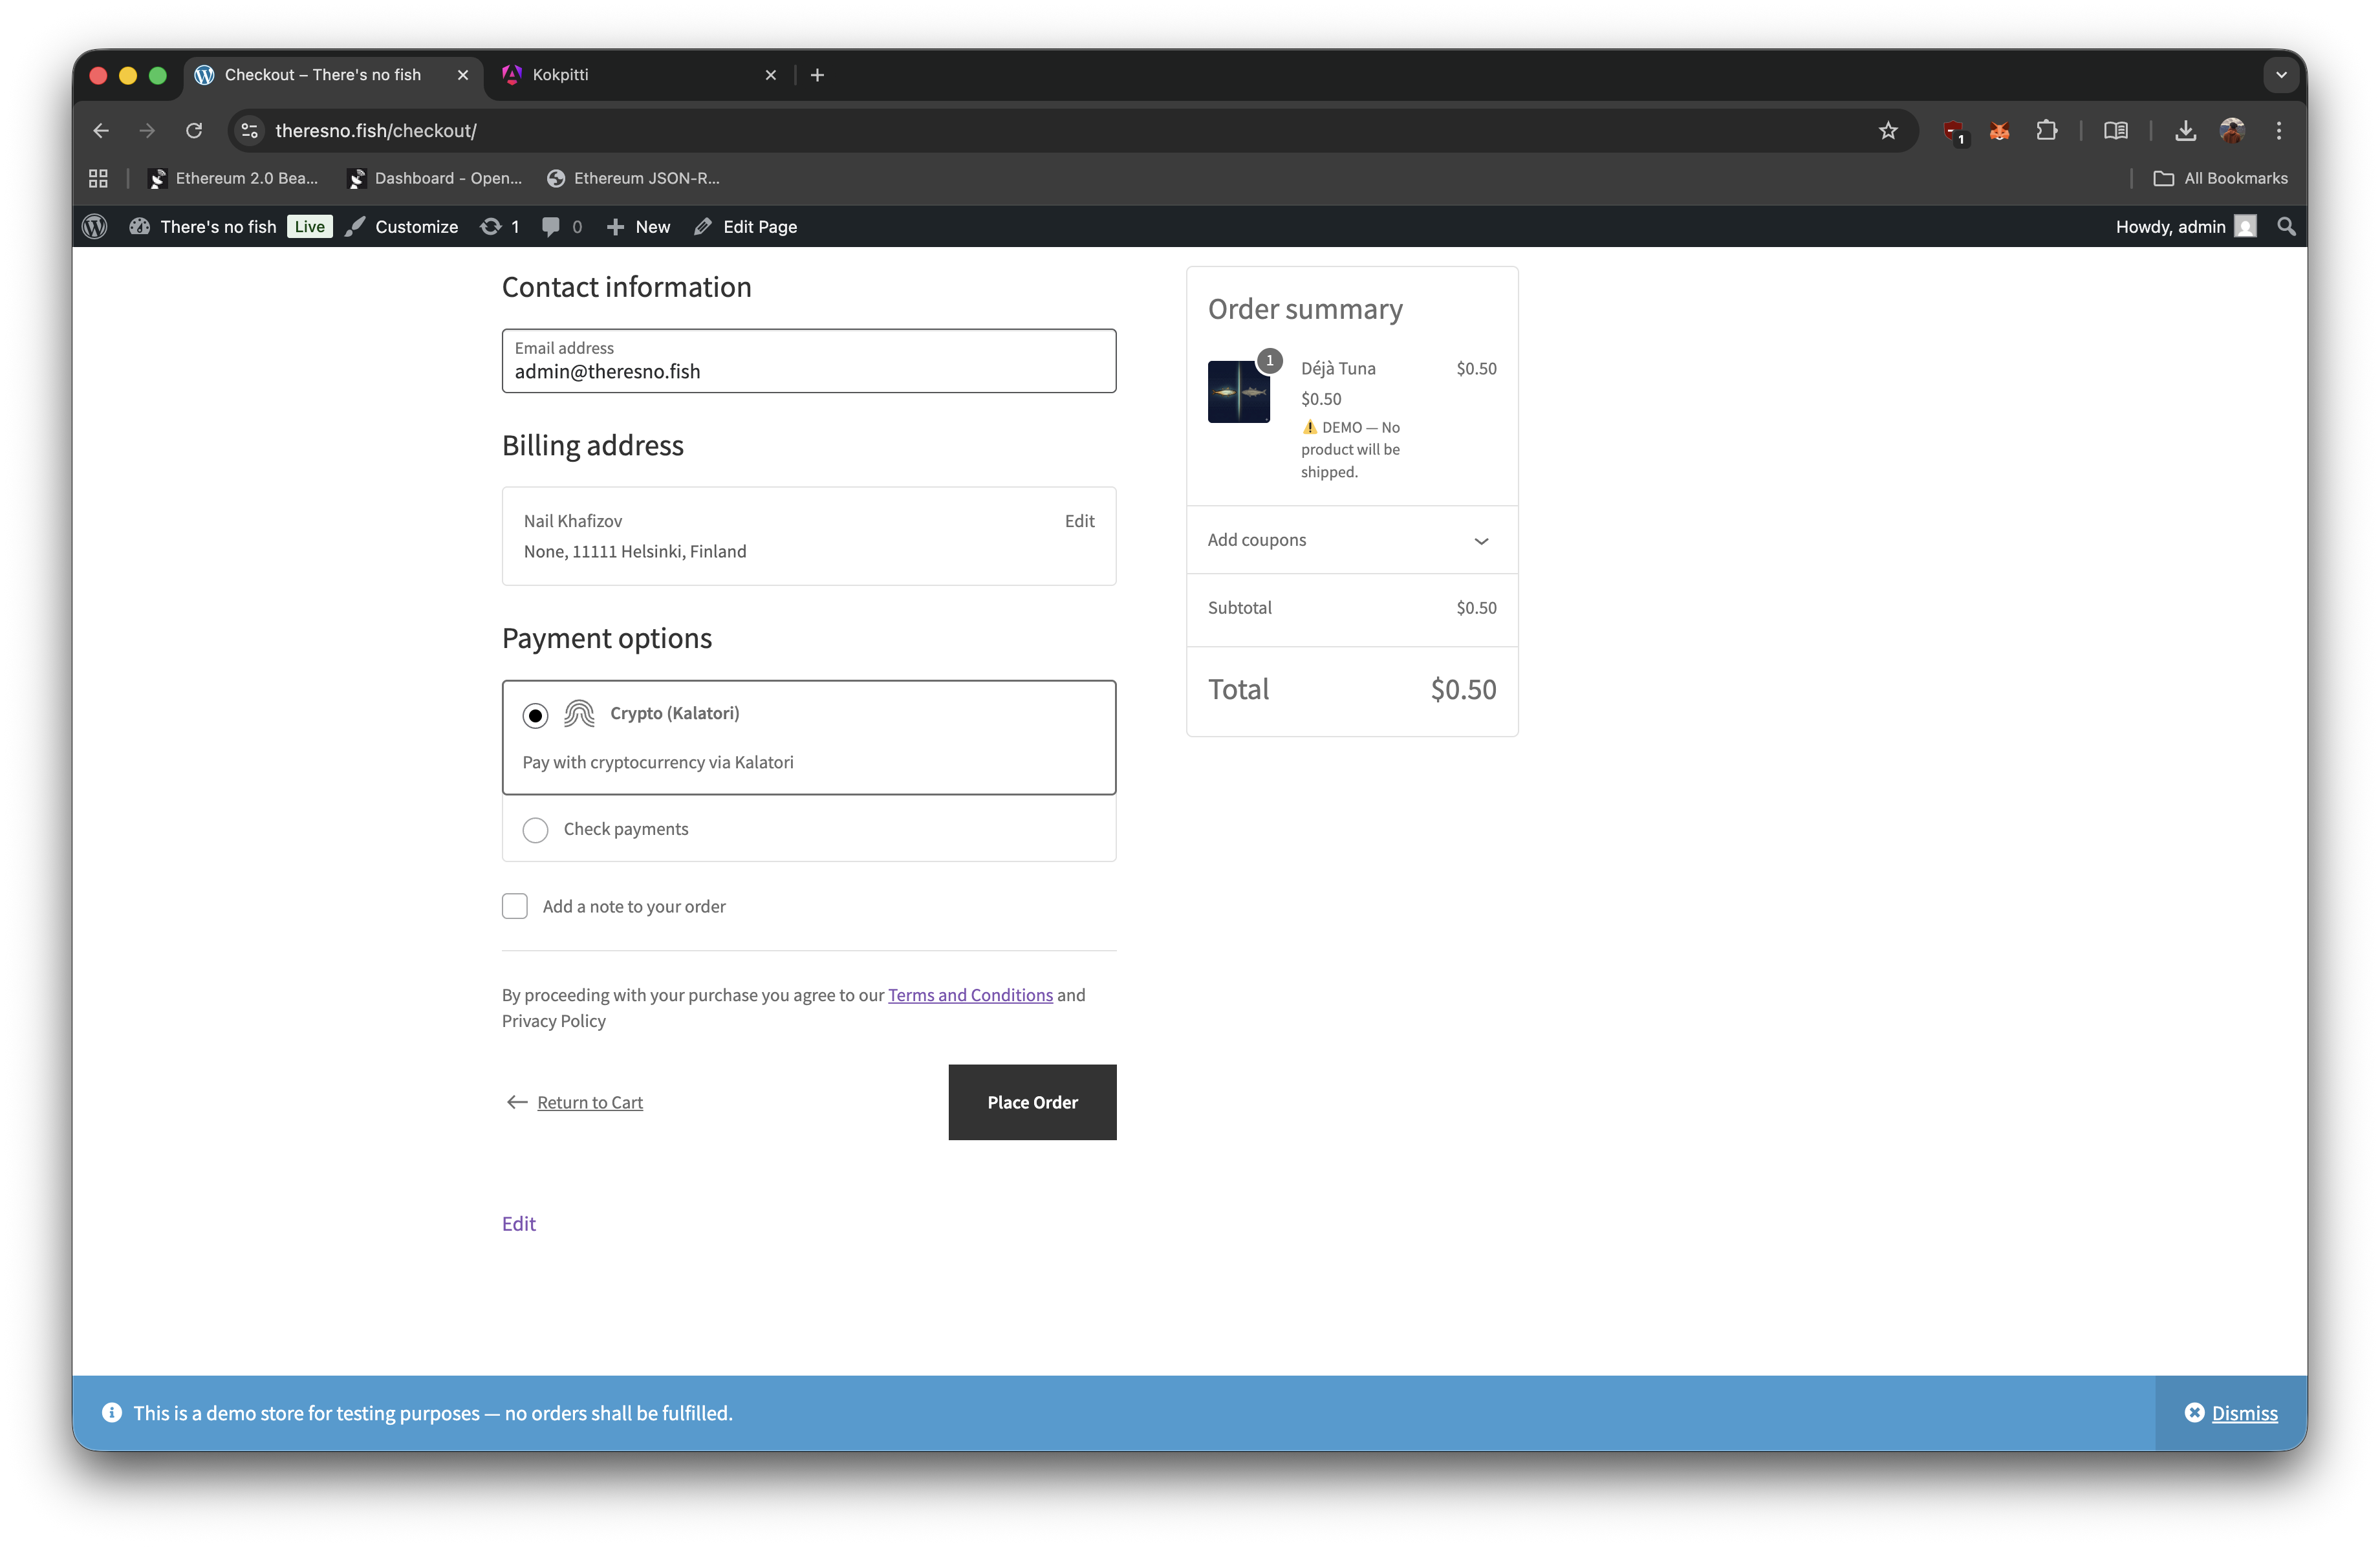
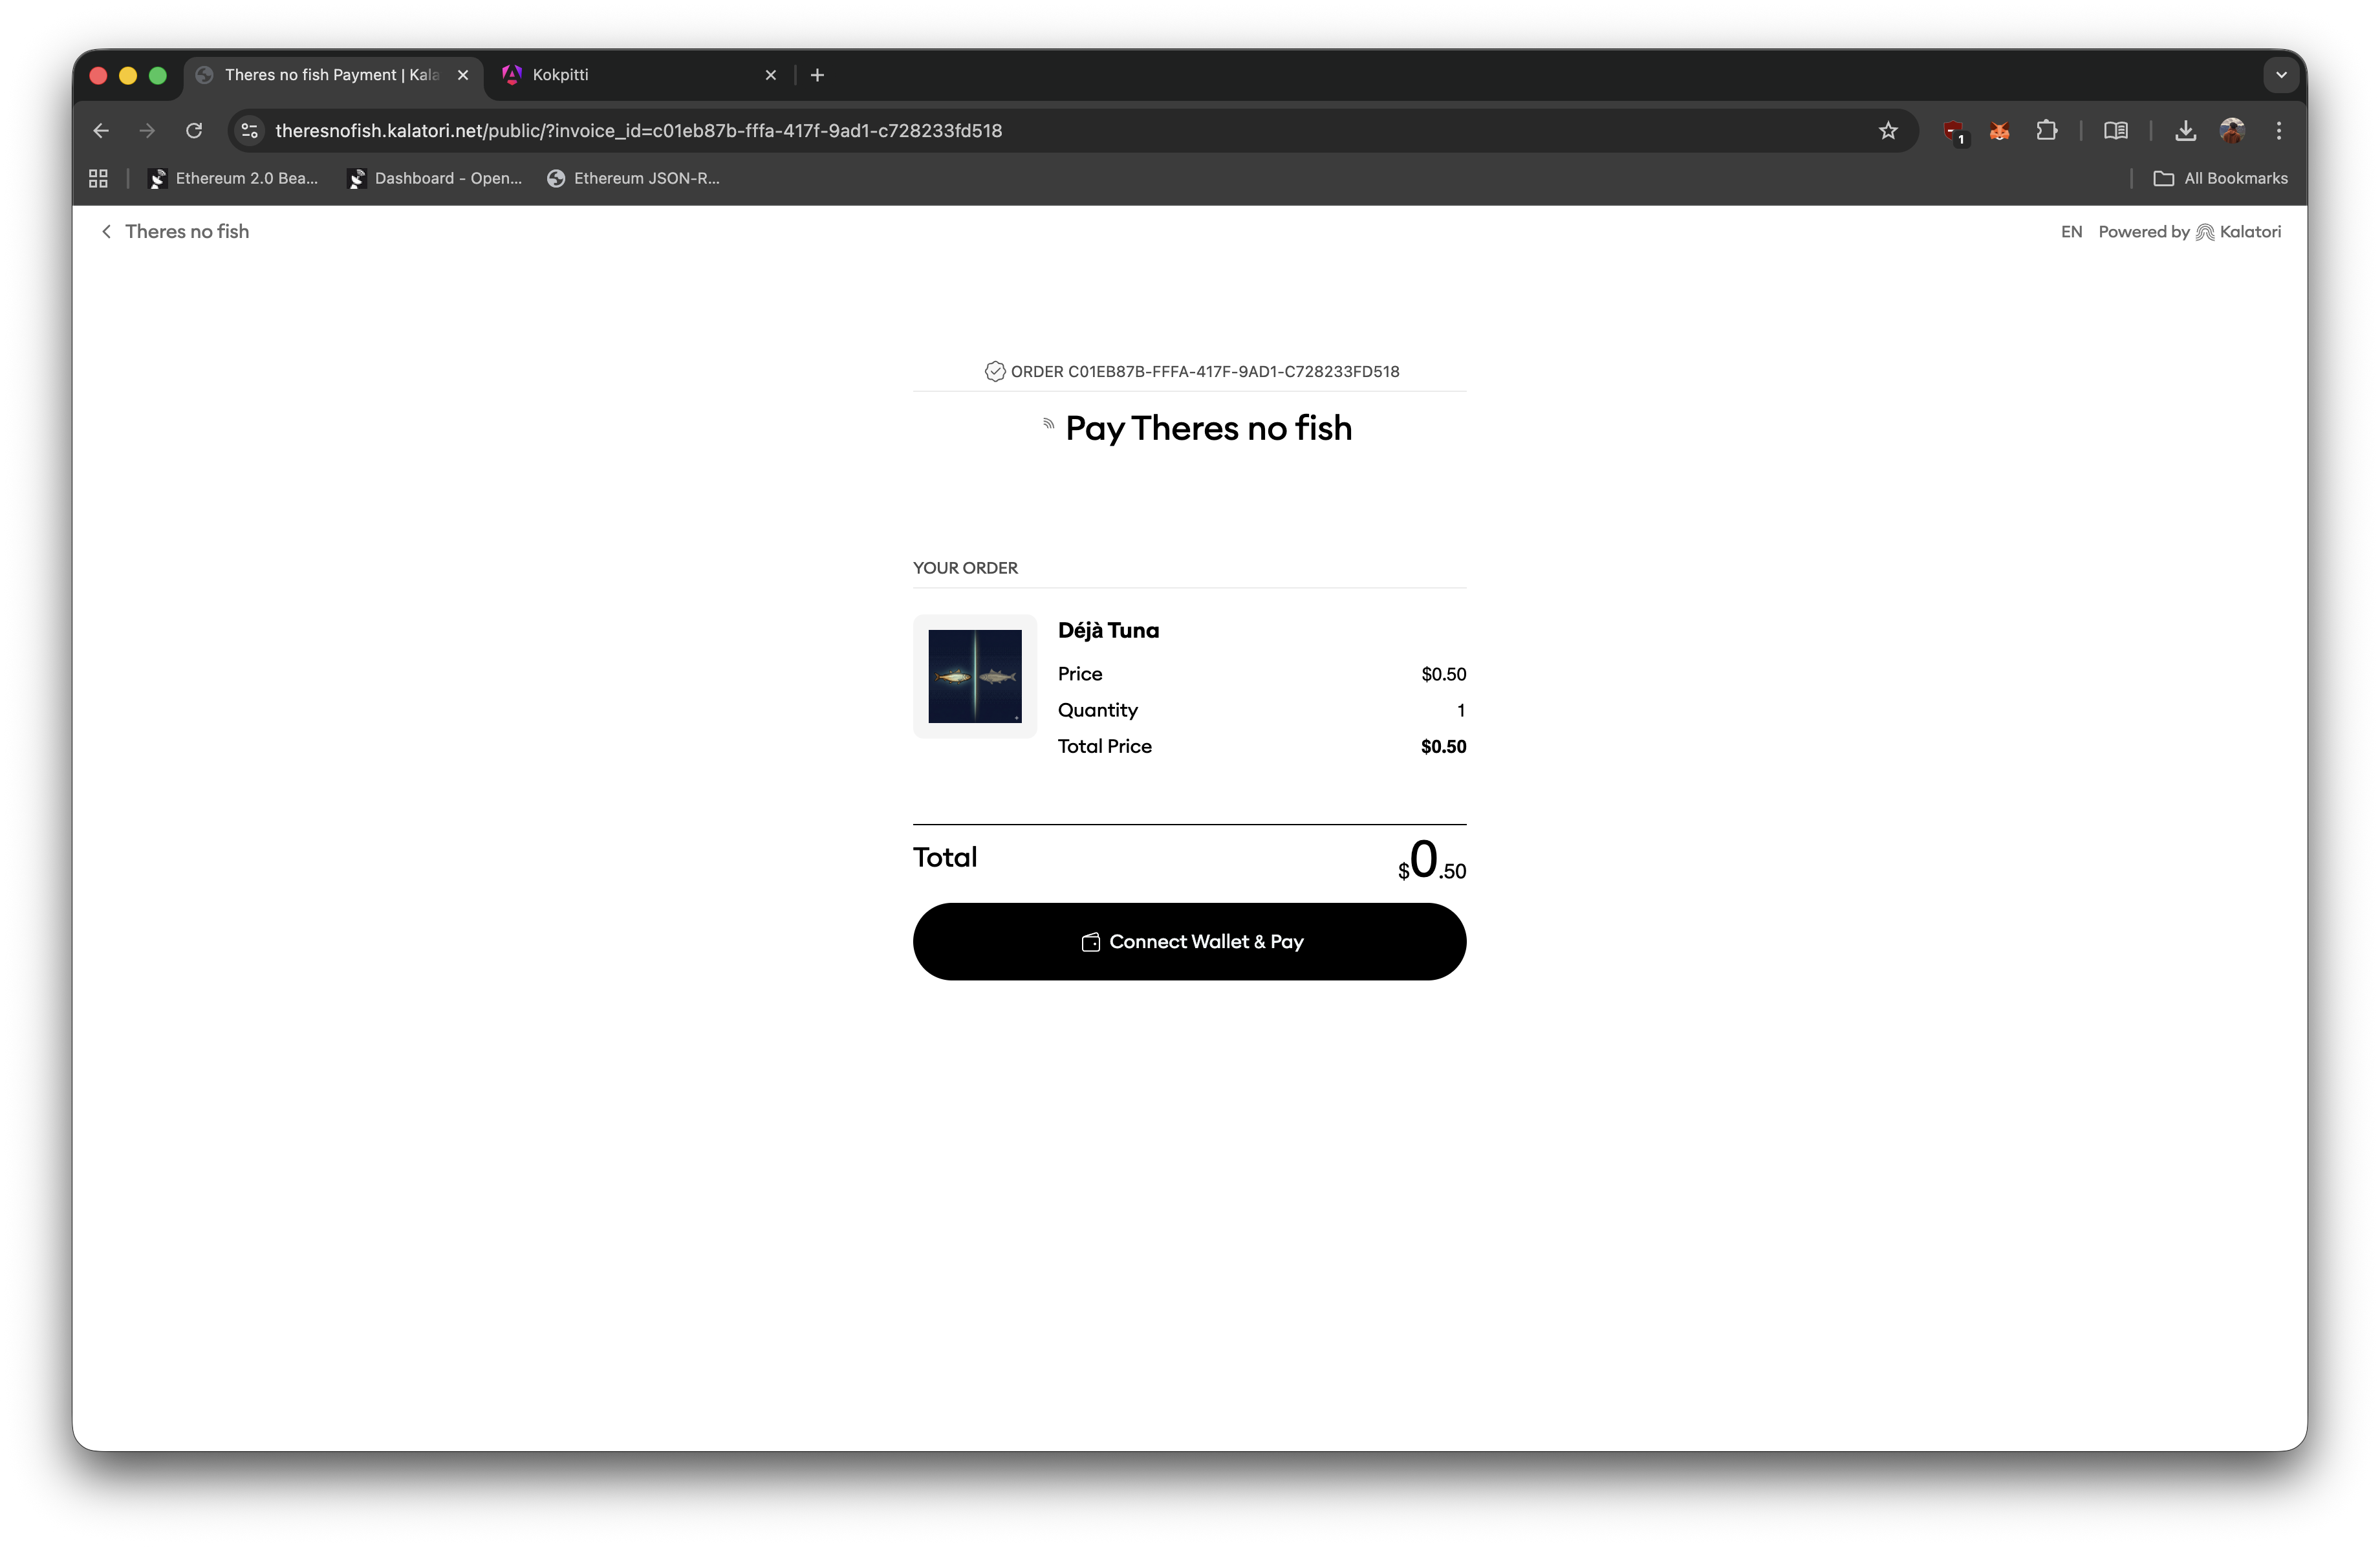
After choosing it, they're redirected to the Kalatori payment page to pay the invoice.
While payment is pending, the WooCommerce order shows as On hold.
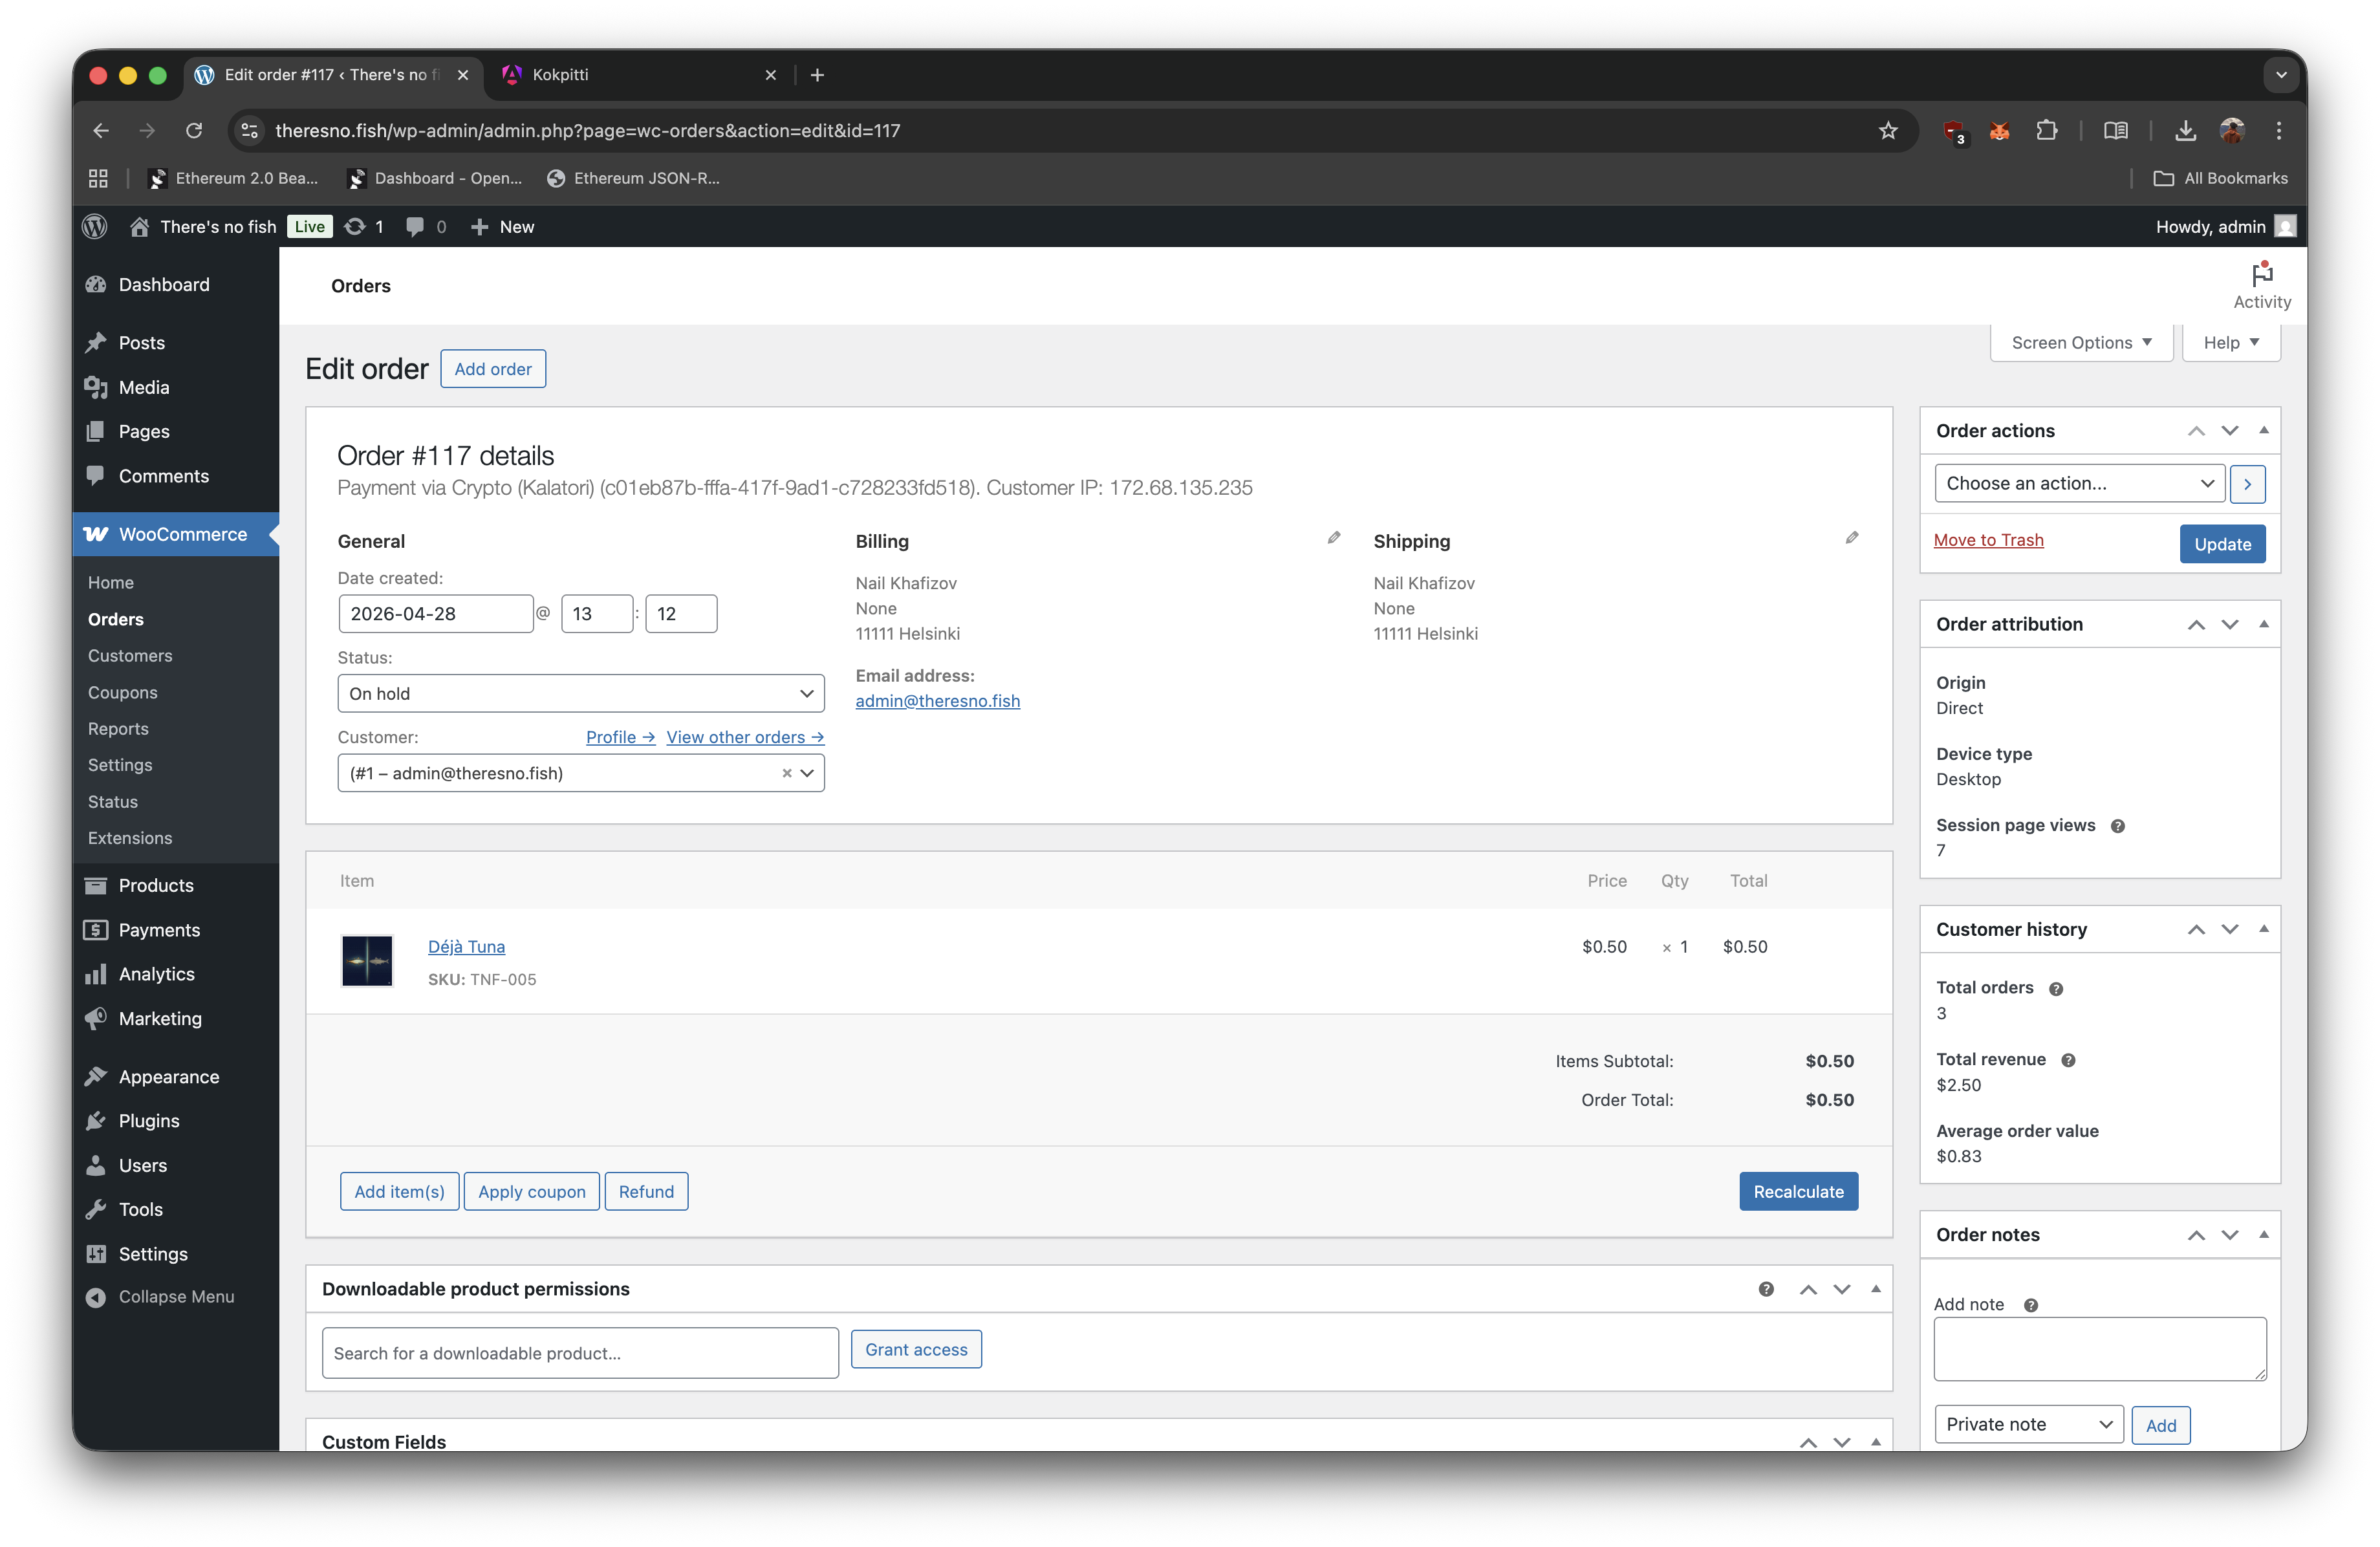
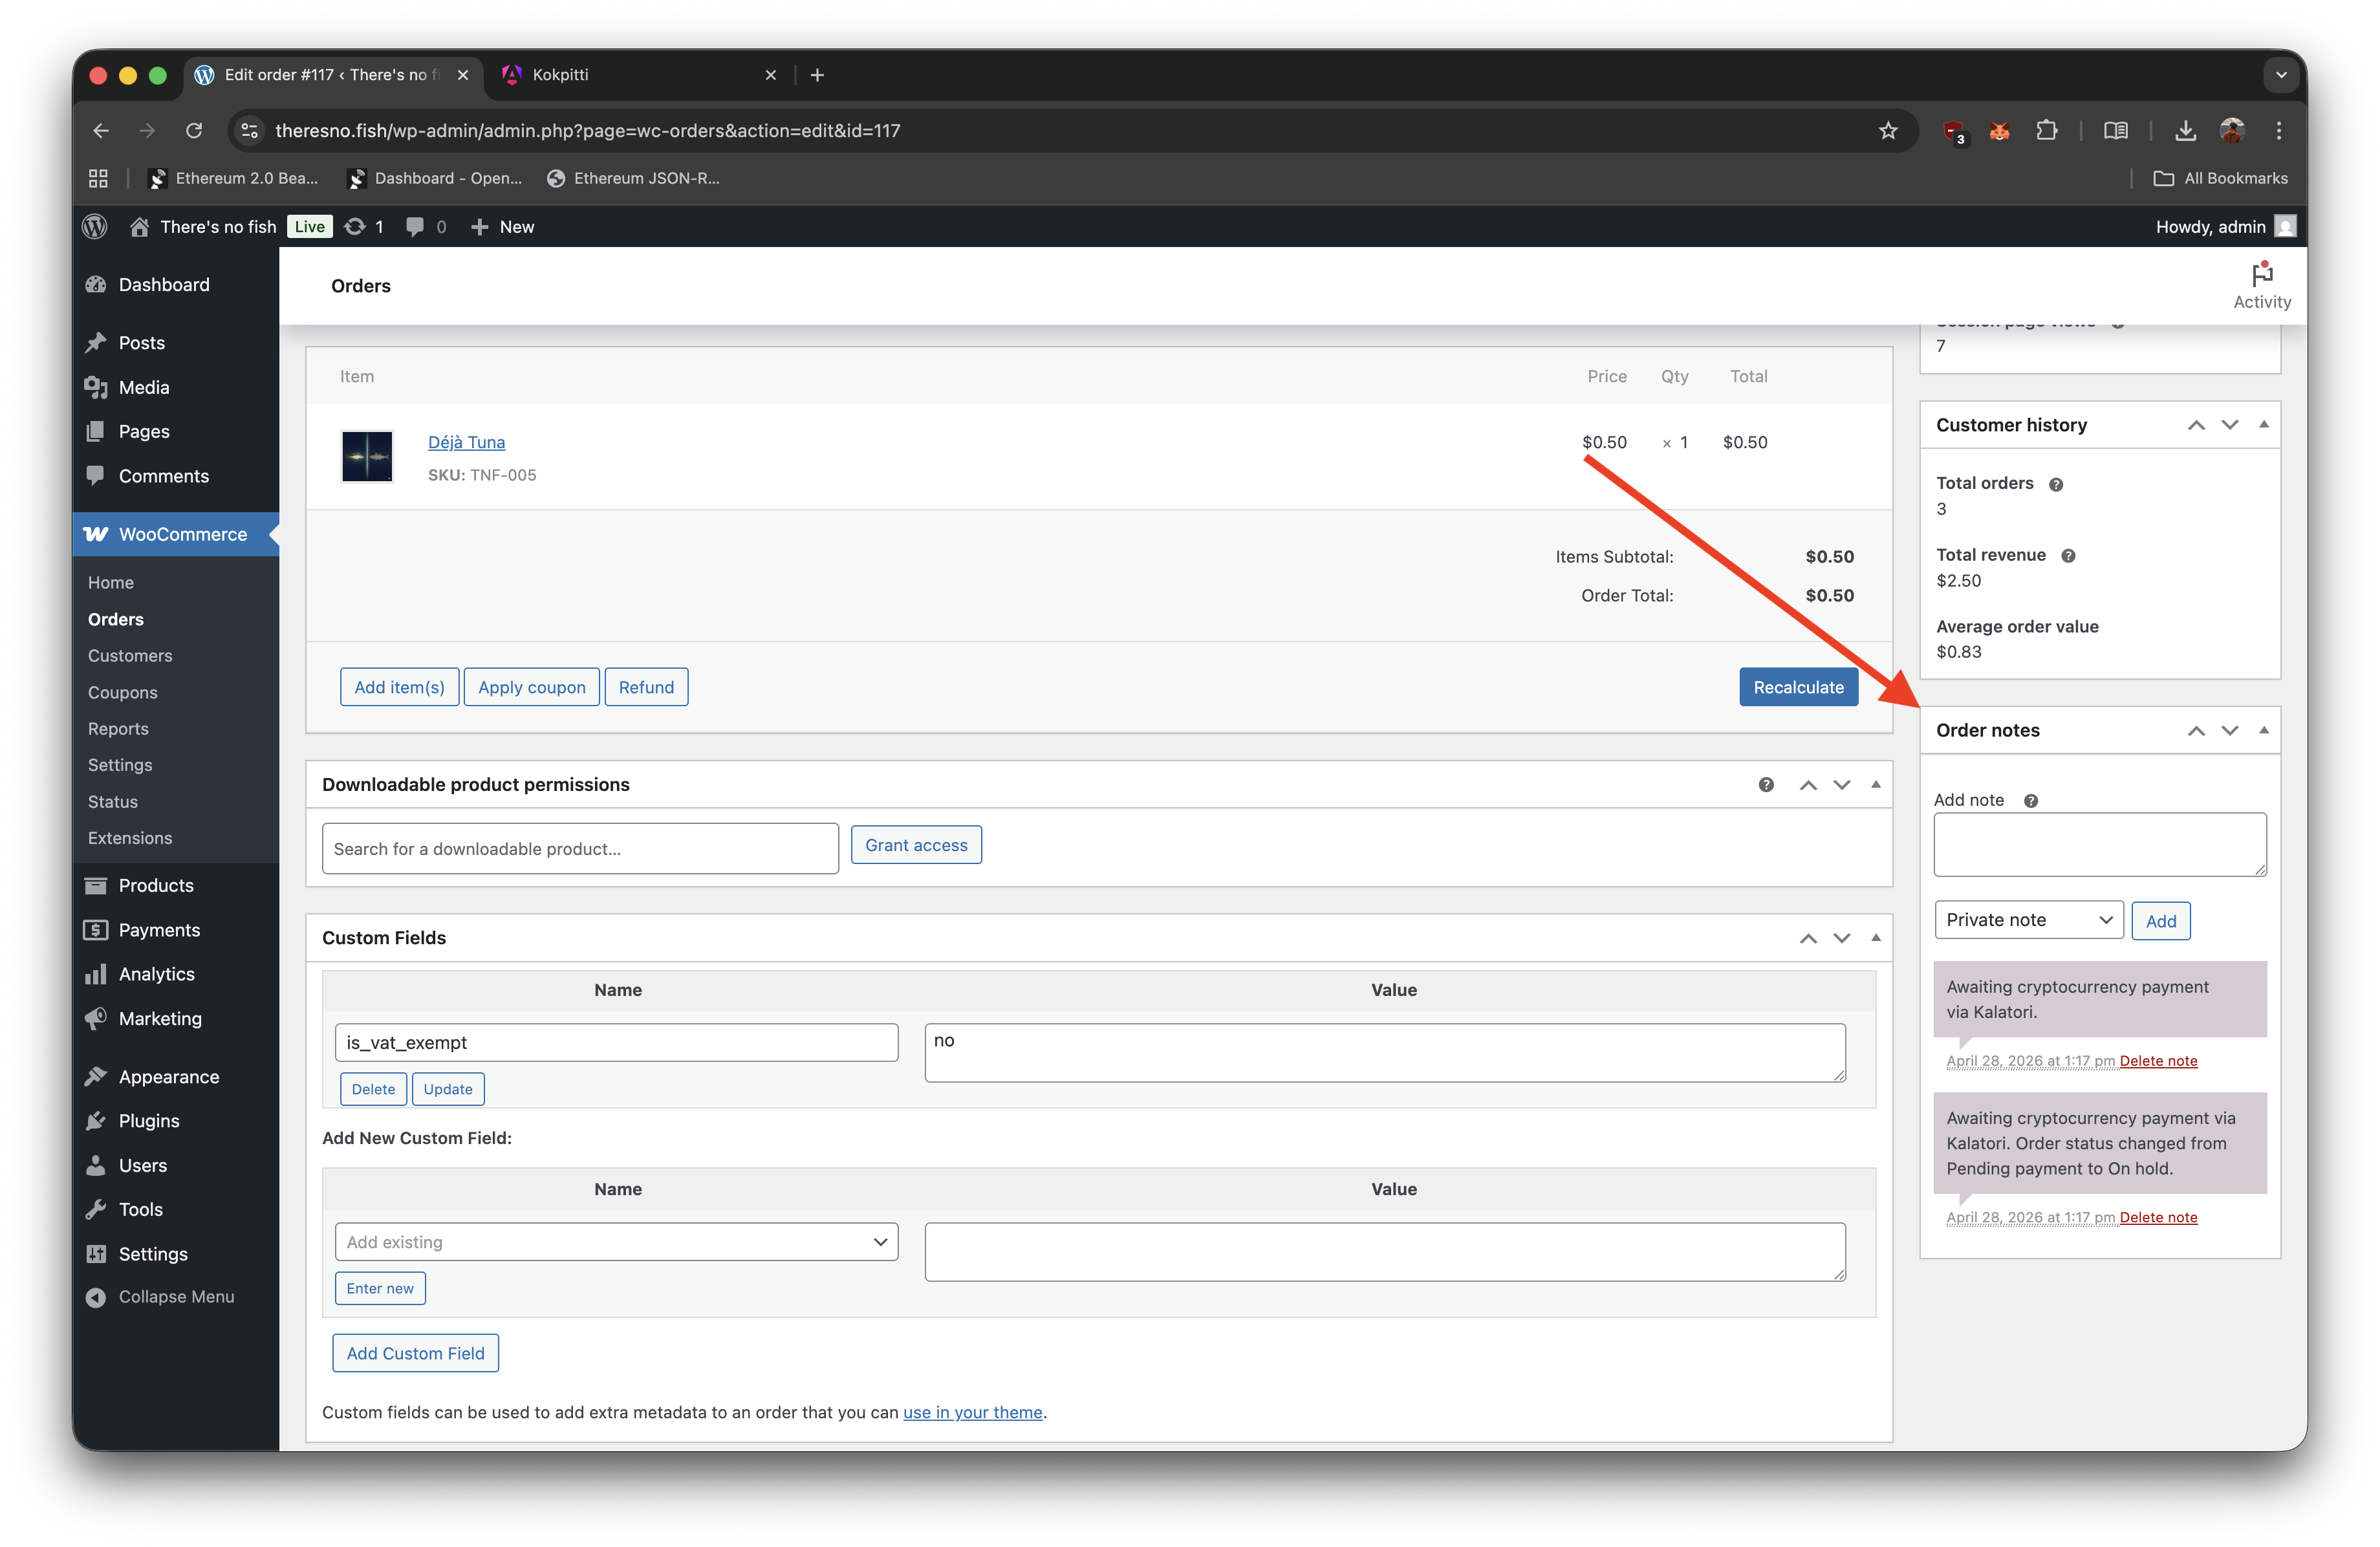
After the invoice is paid, the order should move to Processing automatically. The full payment history is recorded in the order notes.
Back in the Kalatori merchant panel, the invoice in Invoices now shows Paid and carries the WooCommerce order ID, so you can match orders between the two systems.
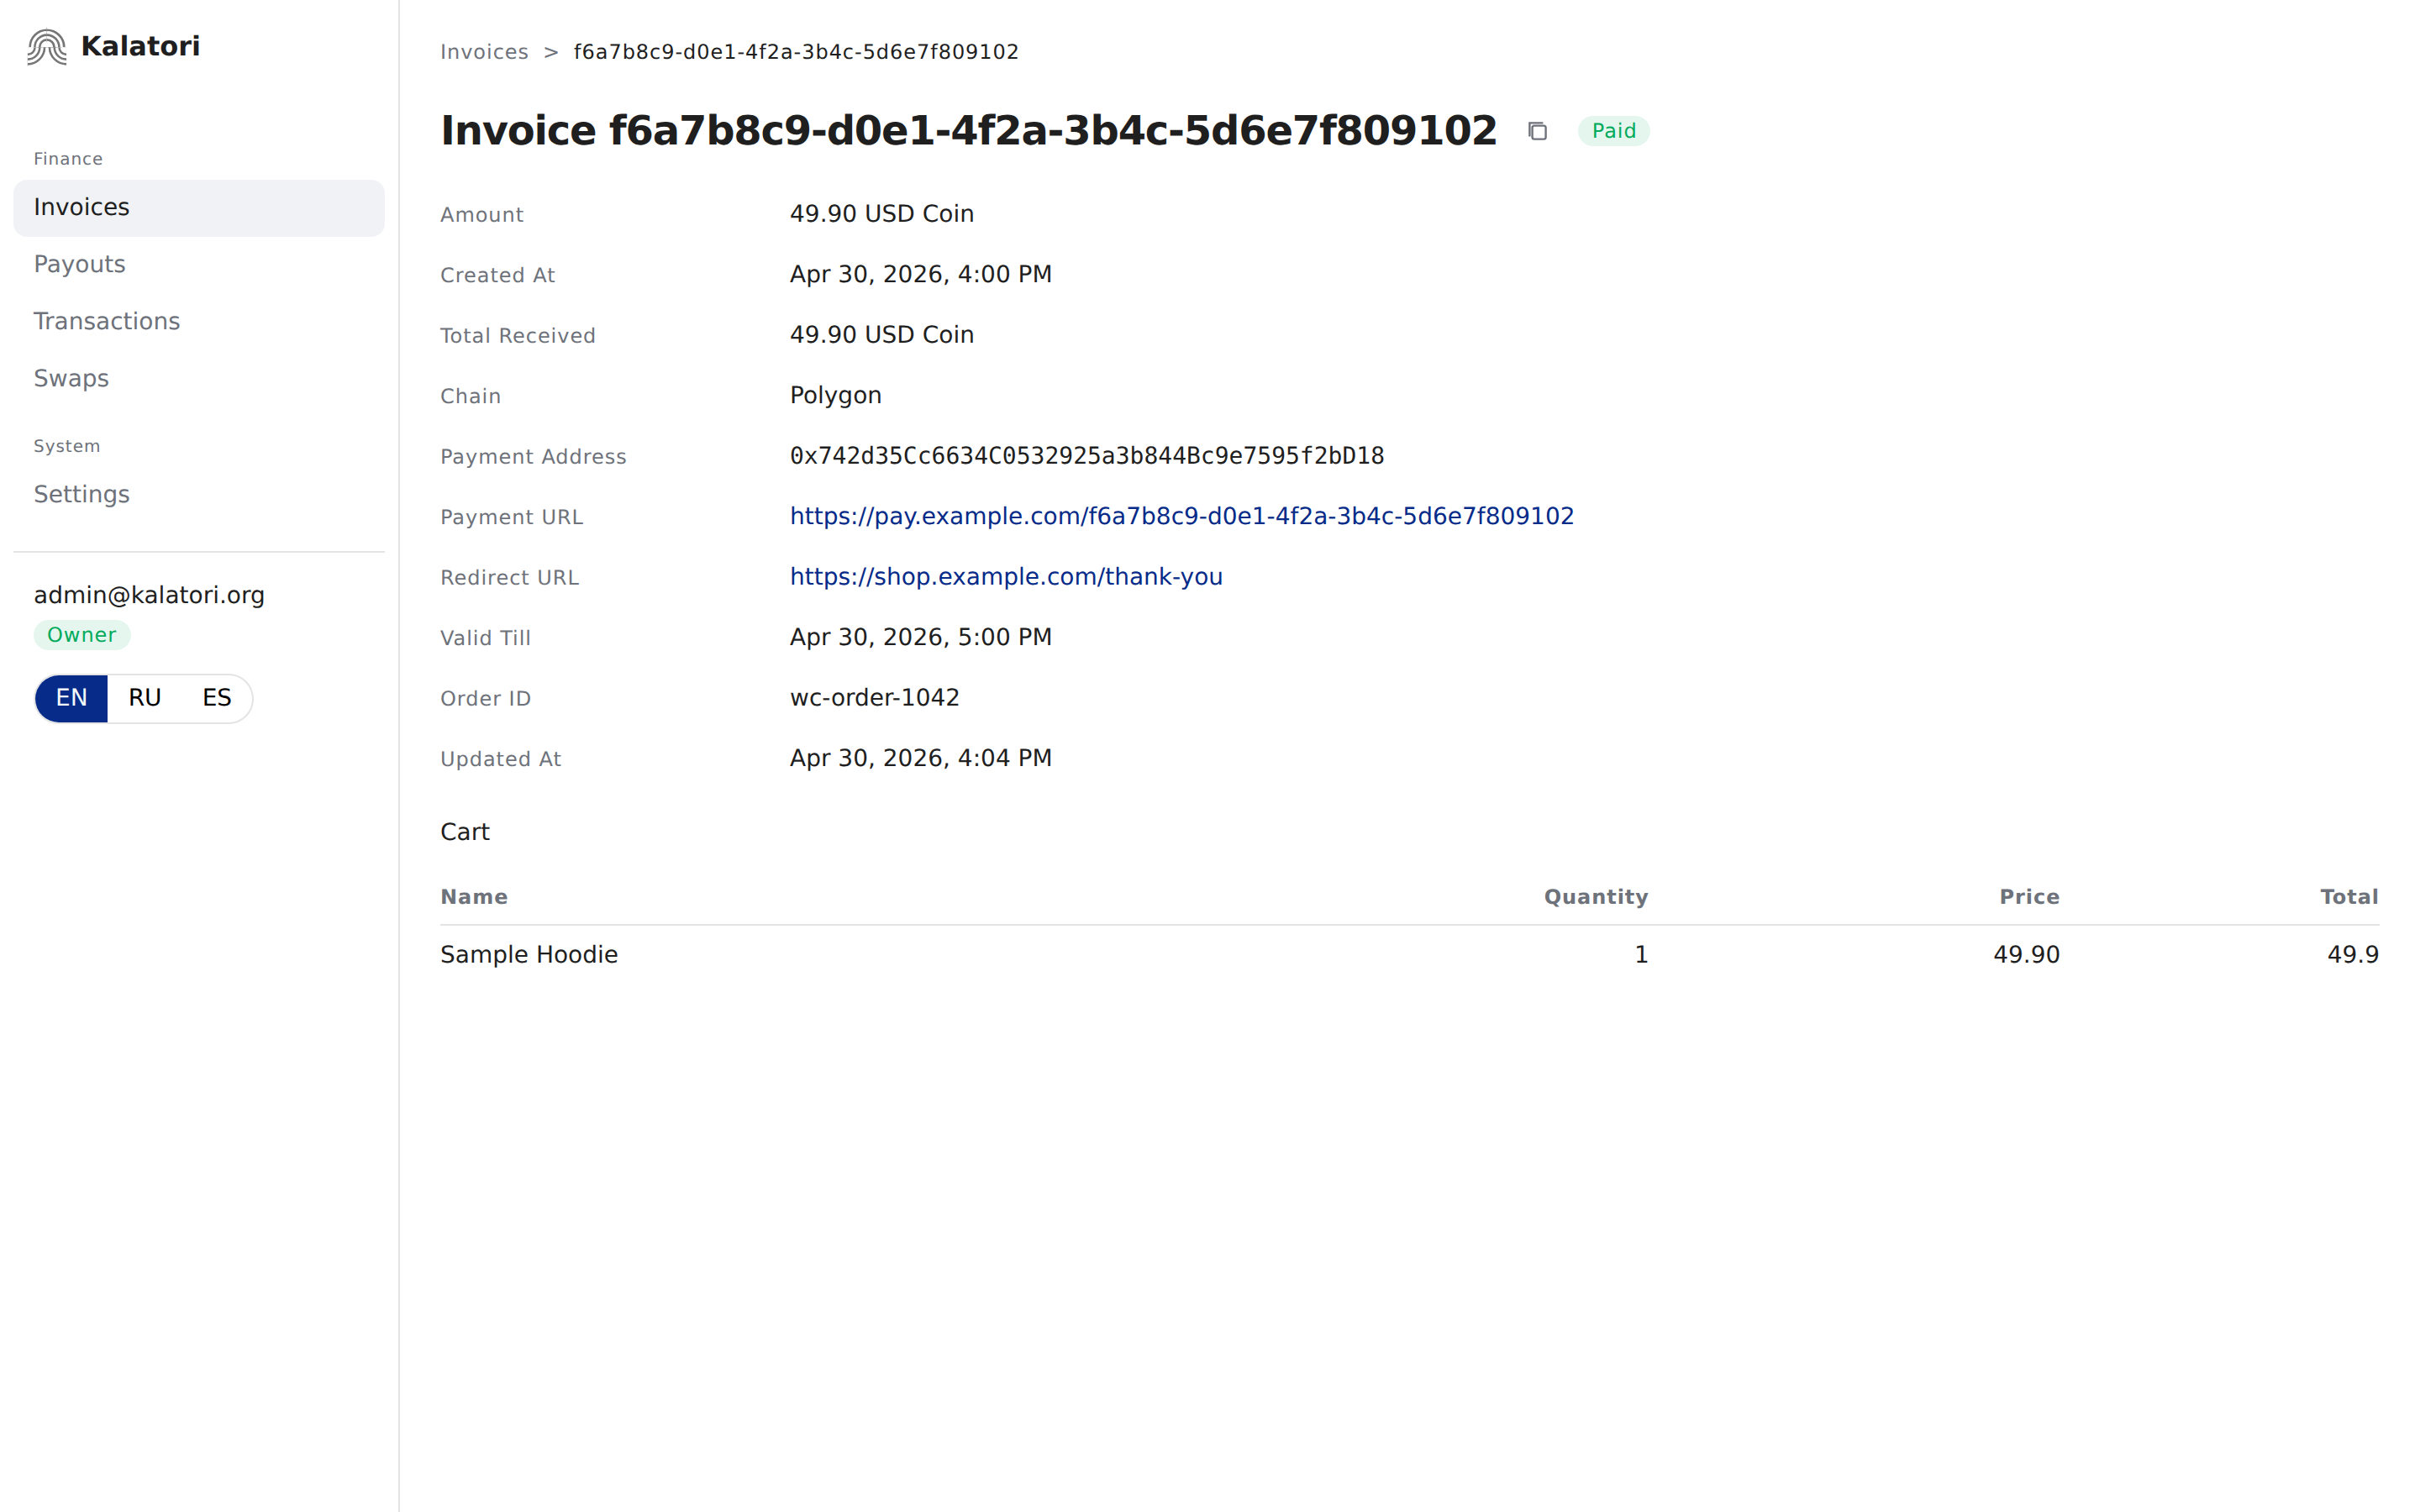
Open the invoice to see the final paid state, received amount, payment address, and a Cart section listing the products from WooCommerce.
Troubleshooting
Test connection fails
- Re-check the platform selection in Settings → Integration. If you switched between woocommerce and Other, download a fresh plugin
.zipand re-upload it. - Make sure your WordPress host can make outbound HTTPS requests. Some hosts block egress traffic, DNS resolution, or requests to external APIs.
- Make sure the Daemon URL in the plugin settings resolves and has a valid TLS certificate.
- Check WooCommerce → Status → Logs for a Kalatori entry, then check Tools → Site Health for blocked HTTP requests or missing PHP modules (
curl,openssl).
Kalatori Payment Gateway doesn't appear under Plugins
- The upload didn't finish — go back to Plugins → Add Plugin → Upload Plugin and try again.
- Some hosts block
.zipuploads larger than the defaultupload_max_filesize. Increase the limit (or ask your host to) and retry.
Plugin says pretty permalinks are required
Go to WordPress Settings → Permalinks, choose any structure except Plain (for example, Post name), and click Save Changes. Then return to WooCommerce → Settings → Payments → Crypto (Kalatori) and run Test connection again.
Crypto (Kalatori) doesn't appear at checkout
- Confirm that Kalatori Payment Gateway is active under Plugins.
- Confirm that Crypto (Kalatori) is enabled under WooCommerce → Settings → Payments.
- Confirm that the store currency is USD. Other currencies aren't supported yet.
- Make sure the product can be purchased and WooCommerce checkout is available for the test order.
Order stays On hold after the customer paid
- Open the invoice in your Kalatori panel and confirm its status. If it's already Paid there but the WooCommerce order is still on hold, the webhook back to WordPress may be blocked.
- Make sure your store is reachable from the public internet and that the webhook endpoint
/wp-json/kalatori/v1/webhook(POST) is not blocked by maintenance mode, basic auth, firewall rules, or a security plugin. - Check WooCommerce → Status → Logs for the Kalatori entry.
- If the invoice in Kalatori is Partially Paid or Over Paid, the customer transferred the wrong amount. Handle the order manually and use the order notes for transaction details.
Need a custom integration?
If you're not on WooCommerce, switch the platform card to Other. The screen will show the Webhook URL, Signature Max Age, Private API Base URL, and API Secret Key you need to integrate with Kalatori directly. See the full API reference at api.kalatori.org.